

Udemy - Rigging 101 for Game Characters | Maya

MP4 | Video: H264 1920x1080 | Audio: AAC 44100Hz 2 Ch
Language: English | Duration: 26 videos, 27Hours 42Minutes | Size: 10.2 GB
https://coloso.global/en/products/3dcharacterartist-ruiricia-us

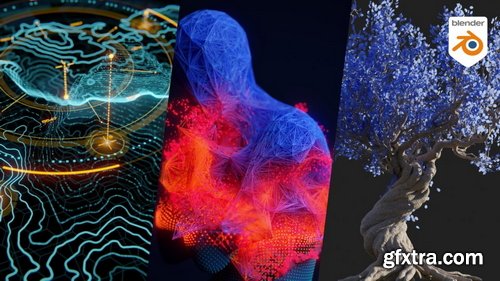
- Blender rencently added a brand new procedural system to its feature set: Geometry Nodes. While being quite powerful it’s not necessarily easily accessible, especially if you are new to procedural workflows. So we decided to cover this system in depth with a new patreon course. In this course Manuel starts from the very beginning and explains how Geometry Nodes ties into Blender, how it handles geometric data and how the different classes of nodes work. Join Manuel on this journey and learn with straightforward consecutive lessons how you can use the powerful new procedural features to enhance your workflow and manage complex setups easily.
- New episodes are added to the course on a regular basis. The episodes are short and easy to follow. Large setups are split into managable chunks. Necessary math and algorithmic concepts are explained when they are needed for the setup.
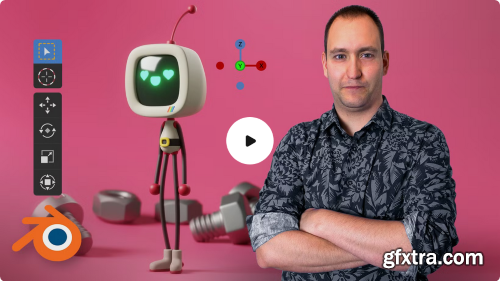
Learn to use basic sculpting, modeling, and rendering tools in Blender
So you've dreamed up a character and sketched out your idea, but it's not brimming with life the way you envisioned. How can you make your character leap off the page with unimaginable depth and realism? In this course, 3D character artist Luis Arizaga—director of the film Holymonks and collaborator for the Goya-winning short Alike—teaches you how to use Blender to model, animate, light, and render characters as lively as the ones running through your mind. Learn to use essential features like modeling and sculpting tools, node systems, light sources, rendering engines, and cameras to create foundational structures with basic objects and build your own character down to the final details.
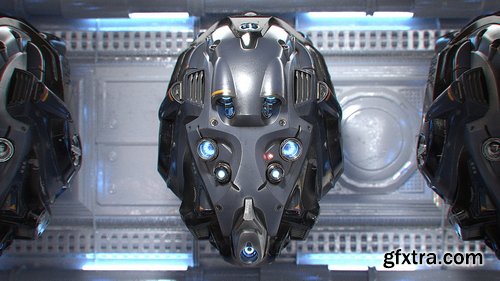
- Much like wrapping paper is to a gift, UVs are to a 3D model. In order to paint textures, UVs must be laid out flat. And ideally the result will be most efficient in favor of texel density – which is the amount of texture resolution applied to a models UVs. We will make use of the Texture Atlas Addon to consolidate our separate objects’ UVs into a single UV space.
- Blender’s painting system enables us to paint directly onto a 3D model, which is often desired over the traditional 2D-texture painting workflow (which Blender also features). We will employ these tools to paint base color, decals, and emission texture maps
- Lighting utilities like ambient occlusion and cavity maps (dirty vertex) can be baked onto the UVs of an object as supplemental textures. In this course we will bake out several maps to aid the worn and torn elements of the helmet materials.
- This is the meat and potatoes of the course. Here we dive deep into Blender’s Cycles shading nodes to construct complex yet flexible materials that will capture the tangibility of realistic surfaces. We will explore 3 variations of metal – painted, tinted, and bare – complete with intricate wear and dust components. Other material types include leather, LED emission, and lens glass.
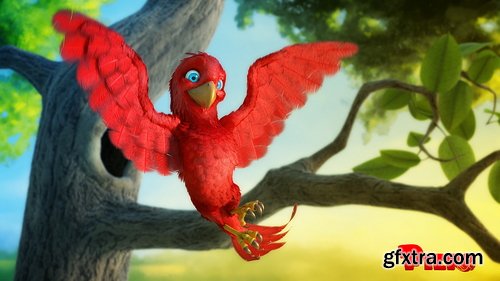
- The first step is modeling where the character is built with 3D geometry. No object exists in the computer intrinsically; it must be built by hand. Every subsequent step is dependent on modeled objects. Blender’s all-in-one nature allows the artist to use its sculpting and modeling tools in conjunction. Piero will be form-sculpted first, then retopologized into an animation-friendly mesh.
- After being built a model must be “painted”. This texturing, or “surfacing”, process is where we introduce proper colors and material qualities that make our model more believable and tangible. Being a bird Piero is a unique texturing task because he needs to be covered in feathers. We’ll take advantage of Blender’s paint tools and Photoshop to paint our texture maps. A particle hair system will allow us to procedurally grow and groom our feathers.
- While modeling and animation are perhaps the most coveted CG skill sets, rigging is the narrow bridge-less-traveled that connects them. Just like our human body needs a complex system of bones and joints to make movement possible, our digital model needs a complex system of bones and joints to make animation possible. This is a highly technical and polarizing process requires much more research and practice than artistic instinct. Piero will be rigged in Blender as an general-purpose armature with full control over wing and tail feathers.
- The art of movement is arguably the most difficult skill set in computer graphics. But don’t tell an animator that – they think highly enough of themselves already! Jokes aside, good animation requires a hefty combination of practice and talent. With Piero we’ll apply the principles of “The Nine Old Men” to realize his personality in motion.
- With the animation finished, our “ingredients” are finally ready to go into the oven! Post Processing begins by rendering our scene into individual frames that make up our entire animation. Once the hours of rendering are finished, we can edit the final shot together in Blender’s compositor.
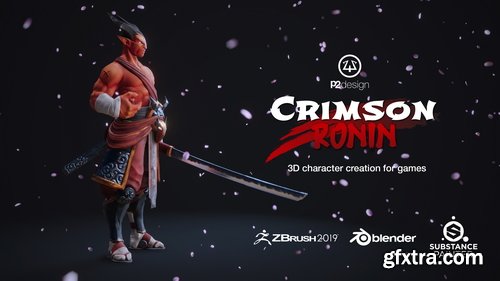
- This course cover every single step from sculpting to the final render inside of Blender realtime engine EEVEE. 47 videos, for over 9 hours of detailed process, including step by step technical explanation, commented video and timelapses. All videos are professionaly edited. All production files available (Zbrush sculpt, OBJ files, blender files, substance painter project, textures, references, HDRi)
- Learn to use ZBrush, Substance Painter, and Blender side by side through the entire sculpting, texturing, and rendering process.
- We will use Zbrush for sculpting, Blender for modeling, retopology UVs and mapping, Substance for texturing, and then Blender’s Eevee for rendering. This three-tool pipeline closely reflects what many professionals and studios use and helps you to become a more versatile and capable artist.
Language: English | Duration: 1h 8m | Size: 1.42 GB
https://www.udemy.com/course/learn-classic-animation-with-animation-desk/
The art of ideas in motion.
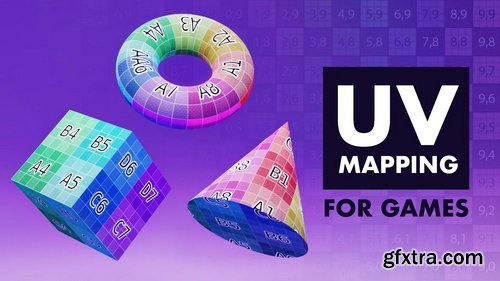
- In UV Mapping for Games we'll tackle, in great depth, one of the most common pain-points that all 3D artists have: UV Mapping. No matter which area of game development you are in, if you interact with 3D models you will need to know about UV mapping - even if only at a fundamental level.
- “What is UV mapping, why do we use it? Do I have to UV map my models?“ Starting by answering “what” UV maps are, we will answer each one of these questions - as well as answering others that you didn’t know you had!
Language: English | Duration: 23 Lectures ( 3h 10m ) | Size: 1.88 GB
https://www.udemy.com/course/learn-rhino-grasshopper-3d-from-scratch/
Foundation of Parametric Design with Grasshopper 3D
https://nikitakapustin1.gumroad.com/l/plasticity-3d-modeling-course
Learn how to master 3D Modeling in Plasticity. The complete solution to apply Key Surface Modeling Techniques to any project.
- Dive into the world of Plasticity and accelerate your 3D modeling skills. This course is the ultimate solution for those who want to understand and apply Key Surface Modeling Techniques to any project.
- If your progress in Plasticity isn't as quick as you'd like, and you're aiming to model complex objects with clarity, this course is for you. Learn not just the 'what', but the crucial 'why & when' of Surface Modeling, allowing you to apply these techniques effectively in your projects.

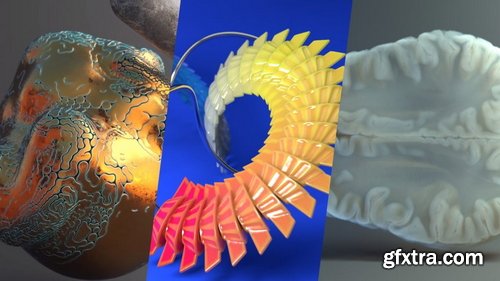
- Stunning 3D visuals that will not only inspire admiration but give you chills! What if you could create easily with automated data without complex key work?
- Anna, a YouTuber receiving worldwide acclaim for his unparalleled use of nodes, will teach you everything from the basic principles to advanced techniques of nodes over 100 chapters.
- An opportunity to bring the scenes in your imagination to life with 50 exercises covering all of the main functions of shader and geometry nodes. Take on the production of an entire animation and master all the latest features, like the hair system and simulation nodes!
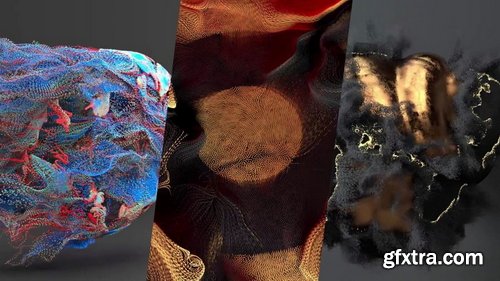
- Basic Houdini UI/UX knowledge, Basic SOPs knowledge, Willingness to be exposed to a tiny bit of math
- A few examples of particle techniques covered in this course: Sticking particles to animated geometry (pt. 08), POP streams and how DOPs works (pt. 07) and particle paint removal (pt. 01). This is an introduction to particle workflows in Houdini using POPs and DOPs.
https://nikitakapustin1.gumroad.com/l/industrial-design-course
Learn how to master Surface Modeling in Plasticity with Industrial Product Design. Tap into your potential with this Plasticity course by experiencing cutting-edge industrial design and advanced surface modeling. Why focus on power tools? They offer the perfect blend of form and intricate details. Far from just another course, this is your transformative guide to pushing the limits of Plasticity. Let's have a look.
https://www.udemy.com/course/absolute-beginners-retopology-and-uv-unwrapping-in-3dsmax/
Learn the secrets of retopologizing in 3dsMax
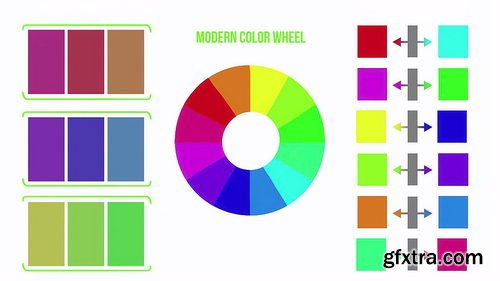
- This first half of the color course focuses on understanding color from the terms associated with color, how lights project color, choosing color schemes, and much more. We go into different discussions like why Red and Cyan are considered true complimentary colors instead of red and green.
- We begin first breaking down what is Color? Why is there confusion when figuring out what is considered Red? As we continue throughout this course we will constantly refer back to the three terms that better explain what color is. From there we dive into working digitally and the differences that brings when working with color projected with light rather than pigments. Once you begin understanding working in RGB (Red, Green, Blue) then it becomes easier understanding how colors mix in this digital format.
- Working with color, we need to understand the color wheels associated with art and the difference between the traditional and modern color wheels. We will then show you how to choose these colors accurately from within Photoshop. Then we take the time to look at the terms associated with color such as tint, tone, shade, monochromatic, greyscale, analogous, complimentary, and warm/cool. There are a lot of color terms but they are quite simple once you know the meaning of each.
- The last section in our understanding color course looks at creating basic color schemes and we have a guest appearance from one of our favorite color artists, Mel Herring giving her insights on working with color as well!
- The second half focuses on working with color. I often find it easier to understand new concepts by first recognizing I was doing something wrong in the first place. We will go through the common mistakes associated with color and how to go about correcting them. Then we go through color shifting using HSB and how to push it even further with fantastical intuition if you want to. From there we explain how important contrast is and having your color speak harmoniously with one another based on their relativity. After we talk about working with the perceptions of each color. In the last videos we touch on the importance of working with neutrals, how light affects color, and confidence!
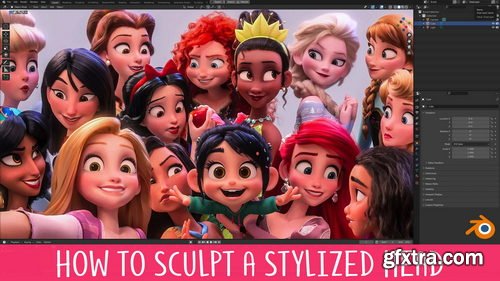
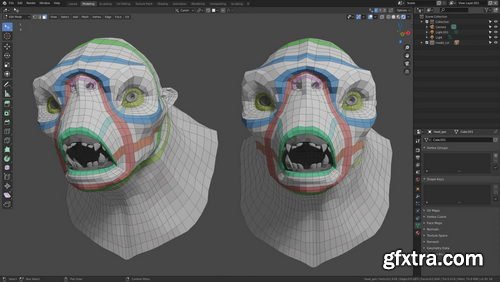
- You’ve probably been taught that sculpting the head starts with a sphere and ends with a head. That’s like reading a book without chapters! This unorganised approach makes the information more difficult to understand and retain.
- This course takes a different approach by breaking the process up into 8 manageable levels. You can think of these levels like checkpoints, and each builds on the one before it. This organises what you need to do and takes away much of the stress that comes with the daunting task of sculpting a head!
- Each level also becomes it’s own exercise, so you can really focus in on those areas you struggle most with!
- We all know the importance of using reference when working but 2D references are limiting, especially when you’re learning. Most of the time you have just a single image to work from. If you’re lucky you might have a character sheet that gives you Front, Side and 3/4 views. This is slightly better, but it’s far from ideal.
- The problem is that when you work in 3D you need to know how the model should look from any percievable angle, otherwise it falls apart. Unfortunately, character sheets don’t include references showing the model 37° to the left and 23° tiilted downwards.
- Having a 3D reference right there in the viewport removes any doubt by allowing you to rotate around the model however you like, whenever you like. I sincerely wish I had this when I was starting out.
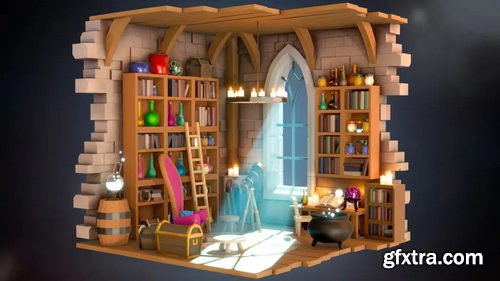
- Ever seen a cool isometric diorama and thought, "I wish I could make that"? Well, now you can! Our Blender Isometric Scene Creation course is designed so you to learn how to build those stunning scenes.
- In this course, you'll dive into Blender and master various modelling techniques, lighting, and rendering. You'll stack modifiers like a pro and use speed hacks to create awesome scenes faster than ever.
- We’ll guide you step-by-step through crafting isometric scenes, perfect for adding to your game dev portfolio. Imagine creating a magical wizard’s workshop or a cosy fantasy tavern, all in 3D!
- This course is perfect for beginners with a basic understanding of Blender. If you’ve made a few simple objects or taken a starter course, you’re ready to level up your skills and creativity!
- Not sure about complex tools? No worries! We focus on making things easier with tips and tricks for quick object creation and modifier use. Speed up your workflow and create stunning scenes in no time.
- You’ll learn to make objects that are easily adaptable, using techniques that save you time. Your scenes will look fantastic with advanced lighting, all without the hassle of a steep learning curve.
- Are you a game artist, designer, or just someone who loves 3D? This course is for you! It’s designed to help you create dynamic 3D environments for games or any other creative project.
- Join us and turn your ideas into reality. With our easy-to-follow lessons, you’ll quickly go from Blender beginner to isometric scene expert.
- Ready to start crafting your own magical worlds? Let’s go!
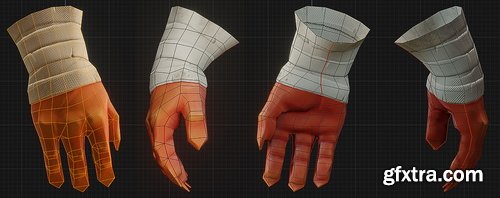
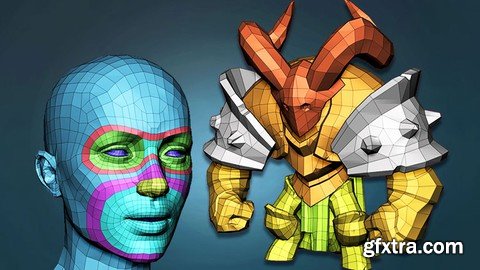
- Learn how to do retopology in Blender using simple and effective techniques. We cover all the tools you'll need as well as a lot of fundamental theory. With over 4 hours of training, this covers everything you need to know about retopology. By the end, you'll know how to retopo your all own characters!
- Industry Techniques: Your instructor, Henning Sanden, has been doing retopology for characters for over a decade - most notably he retopologized the Xenomorph from Alien Covenant. The techniques shown in this series are exactly the same as the ones used on the Xenomorph.
- Fundamentals: We focus heavily on strong fundamentals in Retopology in Blender. Instead of just showing you the different steps, we cover why you retopo like you do. The concepts shown are applicable in all 3D software and are universal.
- Blender Retopology Tools: Throughout Retopology in Blender, we'll use the default modeling tools. No plugins needed! Blender has a great set of tools which are excellent for retopology. We cover all the modeling tools needed, like extrude, polybuild, merge, f2 - and many more!
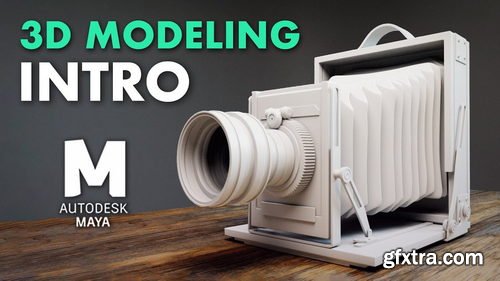
- Learn everything you need to know in order to get started with modeling in Maya! Learn the basic modeling tools, how to model for SubD, master topology, using sweep mesh, vert re-ordering, using deformers, and we're simply scratching the surface!
- PROJECT-BASED: We believe it’s important to learn both how the tools work and also how to actually practically use them. The antique camera project is a 3-hour long real-time series where you can easily follow along. You'll learn industry-standard techniques for building a high-quality antique camera, combining everything you've learnt in the course.
- SKILL LEVEL: Introduction to Modeling in Maya is the perfect series for beginners! If you’re interested in learning modeling in Maya, this is the series for you. No modeling knowledge in Maya is required though we recommend that you know the complete basics, such as how to navigate.
126,000 Royalty-Free 3D Model
Udemy Türkçe


Top Rated News
- CreativeLive Tutorial Collections
- Fasttracktutorials Course
- Chaos Cosmos Library
- MRMockup - Mockup Bundle
- Finding North Photography
- Sean Archer
- John Gress Photography
- Motion Science
- AwTeaches
- Learn Squared
- PhotoWhoa
- Houdini-Course
- Photigy
- August Dering Photography
- StudioGuti
- Creatoom
- Creature Art Teacher
- Creator Foundry
- Patreon Collections
- Udemy - Turkce
- BigFilms
- Jerry Ghionis
- ACIDBITE
- BigMediumSmall
- Globe Plants
- Unleashed Education
- The School of Photography
- Visual Education
- LeartesStudios - Cosmos
- Fxphd
- All Veer Fancy Collection!
- All OJO Images
- All ZZVe Vectors
- CGTrader 1 CGTrader 2


