

- Challenge yourself: So much of the vehicle work we see in the CG world showcases pristine sports cars that most of us can only dream of owning--much less affording. You see a lot of perfectly clean, shiny surfaces with beautiful curving lines. Sports cars are a lot of fun to make and they take no small amount of skill. However, for this course I wanted to do something a little different. Through this Citizen course I’ll be showing you how to tackle a complete, high-resolution vehicle model from start to finish in Blender. The vehicle we’ll be making, designed by David Revoy, has been decked-out with equipment, armor, and weapons to aid in survival. This stage of the course will take you through all of the modeling for the truck design.
- Rugged and ready to roll: Unlike with sports cars, where the goal is clean and pretty, here we’re aiming for dirty, rugged, and beat-up. This is a vehicle that has been thrown together with spare parts, elbow grease, and no small amount of duct tape.

https://artstudio313.net/
- Enhance your 3D skills with our Complete Guide to Blender. Learn modeling and texturing in Blender. Don't miss the opportunity to learn from the best and explore the endless possibilities of Blender. Enroll in our course "The Complete Guide to Blender: From Beginner to the Best Blender User"
Language: English | Size: 7.40 GB | Duration: 9h 11m
https://www.udemy.com/course/pixel-art-academy-from-beginner-to-pro/
Master Pixel Art Creation and Animation — Learn Character Design, Animation Basics, Game Assets & More!

https://www.udemy.com/course/create-a-stylized-anime-room-in-blender/
Master the Process of Creating a Stylized Anime Room in Blender – From 3d Modeling and Texturing to Lighting & Rendering
Language: English | Size: 685.70 MB | Duration: 1h 0m
https://www.udemy.com/course/how-to-draw-cute-cartoon-characters/
"Master the Basics of Cute Character Design for Art, Games & Social Media"
Language: English | Size: 9.05 GB | Duration: 9h 7m
https://www.udemy.com/course/altair-hypermesh/
learn with us HyperWorks is an analysis and Optimization Solution
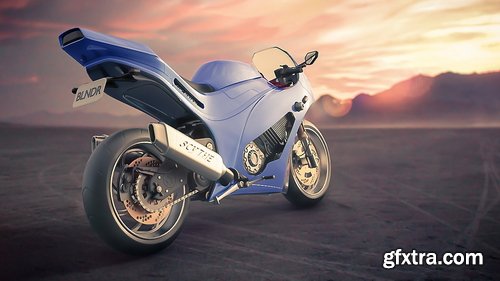
- In this five-hour course, we’ll be creating a high-poly motorcycle model in Blender. We’ll start with a basic modeling sheet and a few reference photos, and then begin by blocking things out. Next, we’ll refine the body a bit, using subdivision surfacing and a variety of mesh tools to get the shape that we want.
- We’ll then move on to build the engine. We’ll use many of the same techniques, but we’ll also look at the Bevel tool, Path objects, and the use of N-Gons to create mechanical components. In addition to the engine itself, we’ll build an exhaust, frame, and radiator for the bike. In the third segment, we’ll move on to the wheels, tires, and suspension. We’ll first create the tires and wheels themselves, then create the brake rotors and associated parts. We’ll then work on the chain and drive gear, transmission, and rear suspension components. Next, we’ll build the front fork assembly, integrating it into the model. We’ll then create a number of accessory pieces such as the kickstand, license plate, and foot brake. Because this course is targeted at more experienced users, we’re not going to spend much time on the tools and basic functions of Blender. Instead, we’ll focus on technique and workflow, looking at some ways to build complex hard-surface models in a reasonably short time period.


Fasttracktutorials - Advanced Stylized Character Art Course
https://fasttracktutorials.com/tutorial_single/1911
- Learn the entire process of creating a stylized 3d character for games. In this course you will learn how to do High-Poly, Low-Poly, Retopology, UV unwrapping, Baking, Lookdev and Rendering!
- We will create the High-Poly inside Zbrush, - Retoplogy, UV's and rigging will be done in Blender3d. Next to this, we will also use Substance Painter to create unique textures, and we use Marmoset Toolbag 5 to do the lookdev and rendering!
- In this course, you will learn everything you need to know to create the final results that you see in the images and trailers. Next to this, the same techniques can be applied to almost any type of 3d characters.
- This course contains over 55+ hours of content – You can follow along with every single step – The course does enclose 2 small-time lapses, this is just to speed up very repetitive tasks, the rest is done in real-time.
- We will start by going over our reference and then we dive right in and create a blockout of our character in Zbrush. we will then turn our blockout models into refine High poly.
- Once we are done with our high poly, we are going to export it to Blender to start doing the retopology and UVs process.
- We will then go to Substance Painter to do the baking, and we will use Photoshop to fix some baking issues. Once that’s done we will start doing the textures for our model in Substance Painter and we are going to do the lookdev inside Marmoset Toolbag 5. After, will go back to blender to do a basic rig to make an interesting pose for our character.
- Finally we will go over on how I made the render scene and how to make high resolution renders inside Marmoset Toolbag 5
- This character art tutorial is perfect for students who have some familiarity with a 3d Modeling tool like Blender, Substance Painter, Zbrush and Marmoset Toolbag 5 – Everything in this tutorial will be explained. However, if you have never touched any modeling or texturing tools before we recommend that you first watch an introduction tutorial of those programs.

Master Character Design in Blender for Unity & Unreal Engine
Go from Hobbyist to VFX Compositor Build Studio-Ready Shots in Nuke, Step by Step
Master the skills studios actually hire for:
multi-pass compositing, CG integration, and cinematic shot polish —
even if you’ve never opened Nuke before.


Udemy - Master Character Sculpting in ZBrush from Model to 3D Print
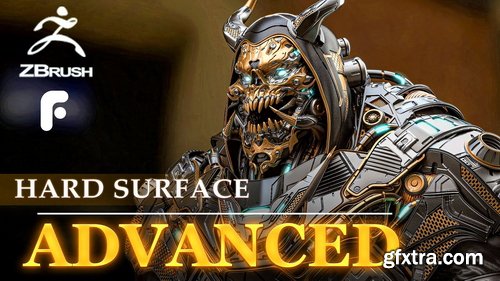
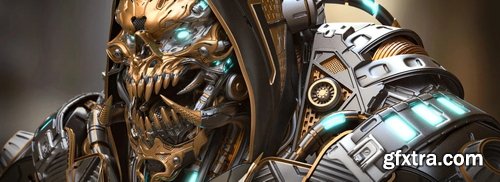
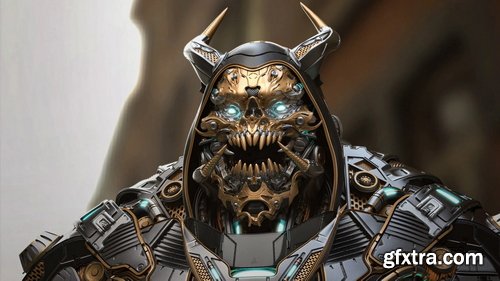
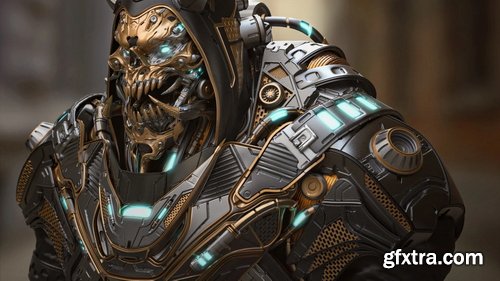
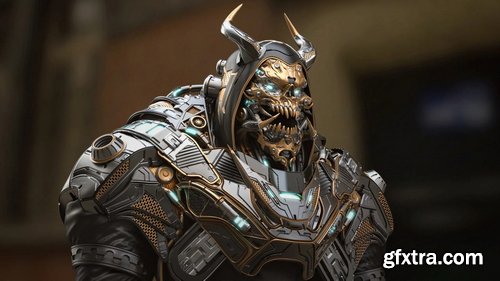
- accompany senior character artist Hafez Yadollahi and learn to Sculpt advanced Hard Surface Character for Product ! You'll learn to sculpt your character in ZBrush, create materials in Keyshot, light and present your work, and even more.
- After completing the course, you'll have a great understanding of how to create your own Hard Surface and Sci Fi character art.
- This video was recorded in full and at normal speed... without any omissions... and without sound reproduction.(No Voice)
- Starting in ZBrush, we will teach you advanced techniques for Sculpting your 3D character from scratch. When concept sculpting the model, we'll block in both the anatomy and hard surface mesh. Once the high-poly is done, We are going for a clean topology so that we can add Small details to it .
- In Keyshot, we're Using the Default materials step by step. We'll set up basic shaders. Finally, we're lighting and rendering our character to make a stunning final image you'll be proud to put in your portfolio.
- This course is designed for artists with an medium skill level who are ready to push their character art to the Epic. The course does not spend time covering the basics, and assumes ample knowledge of the pipeline and software involved in creating 3D art . this is the course for you if you're ready to push yourself to the next level
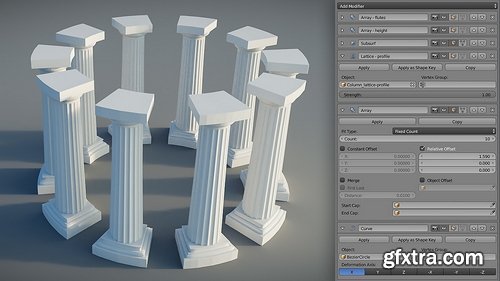
- In a more traditional modeling workflow we spend a lot of time adding, removing, and tweaking the vertices and edges that make up our model. Typically we do this via the various mesh modeling tools that we learned about in the Mesh Modeling Fundamentals course. These tools give us very good control but it also means there's a lot of manual work, which can lead to more complicated mesh operations and ultimately, an unnecessarily complex mesh. Modifiers give you the power to work in a less-destructive manner, with more flexibility and speed. To give you an idea of how they might be used, consider the Mirror modifier, which is used for adding symmetry to your mesh. Rather than recreating the same details on the left and right (or front and back, or top and bottom), of your model, instead you can create it on just one side and let the mirror modifier replicate it to the other side automatically. The more you model the more you'll find modifiers to be an essential part of your workflow, and a big boon for your productivity and effectiveness. This course gives you an introduction to how modifiers work, a run through many of the essential modifiers, and puts these tools into practice through a modeling demonstration and exercise.

")
https://www.udemy.com/course/autodesk-navisworks-manage-essentials-advanced/
Learn Navisworks Manage (Navigation Reviewing the Model - Clash detective - 4D - 5D - BOQ-Rendering-Animation)

https://www.udemy.com/course/learn-blender-python
Boost Your Productivity with Automation and Build Your First Tools


- In the early stages of the course, we will start with relatively simple dynamics. Using the CSI system, dynamic lines will be extracted, and simplified theory will be developed based on this foundation. The original dynamic characteristics will be preserved for analysis. Later, practical exercises will be conducted on the dynamics of specific characters based on the generated dynamic lines.
- Next, we will move on to the picture composition section. The course will design many pictures at different difficulty levels and conduct sequential training. Through the "Find the Character’s Performance Line" game, we will learn how to use reasonable elements to build the desired picture structure.
- Most of the time, we first think about specific content and then consider how to simplify its shapes. Here, we try the opposite: first, you are given an abstract shape composed of circles, squares, and triangles, and then you fill it with specific content. If we can achieve this, the so-called "flat composition analysis" will no longer be a retrospective review but something that can be anticipated in advance.
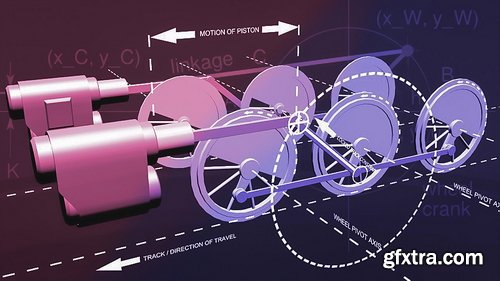
- In this course, we'll rig a set of locomotive wheels in Blender using constraints. We'll focus on converting rotating motion to reciprocal (back and forth) motion. This type of rigging can be very difficult, and is most often achieved with the use of Armatures and Inverse Kinetics (IK). In this course, however, we'll look at a way to do it using the Locked Track, Copy Location, and Shrinkwrap constraints. During the first video, we'll take a look at the final rig and briefly discuss the Shrinkwrap constraint. In the second video, we'll do the bulk of the rigging work. Here we'll look at some of the difficulties involved in this rig, and how the obvious solutions don't quite work. Then we'll set up a constraint-based rig that does work. In the last video, we'll do some additional rigging on the wheels. We'll also use a Transformation constraint so that the wheel automatically turn as we move the train forward. Geometry of train wheels explained in PDF document by Terry Hancock (re-used with permission) and included with the downloadable source files..
126,000 Royalty-Free 3D Model
Udemy Türkçe


Top Rated News
- CreativeLive Tutorial Collections
- Fasttracktutorials Course
- Chaos Cosmos Library
- MRMockup - Mockup Bundle
- Finding North Photography
- Sean Archer
- John Gress Photography
- Motion Science
- AwTeaches
- Learn Squared
- PhotoWhoa
- Houdini-Course
- Photigy
- August Dering Photography
- StudioGuti
- Creatoom
- Creature Art Teacher
- Creator Foundry
- Patreon Collections
- Udemy - Turkce
- BigFilms
- Jerry Ghionis
- ACIDBITE
- BigMediumSmall
- Globe Plants
- Unleashed Education
- The School of Photography
- Visual Education
- LeartesStudios - Cosmos
- Fxphd
- All Veer Fancy Collection!
- All OJO Images
- All ZZVe Vectors
- CGTrader 1 CGTrader 2


