
- Basic Houdini UI/UX knowledge, Basic SOPs knowledge, Willingness to be exposed to a tiny bit of math
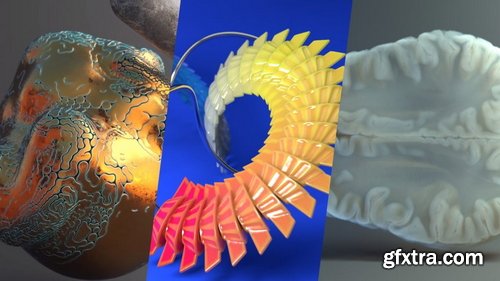
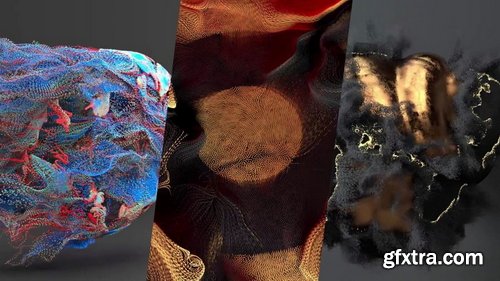
- A few examples of particle techniques covered in this course: Sticking particles to animated geometry (pt. 08), POP streams and how DOPs works (pt. 07) and particle paint removal (pt. 01). This is an introduction to particle workflows in Houdini using POPs and DOPs.

https://nikitakapustin1.gumroad.com/l/industrial-design-course
Learn how to master Surface Modeling in Plasticity with Industrial Product Design. Tap into your potential with this Plasticity course by experiencing cutting-edge industrial design and advanced surface modeling. Why focus on power tools? They offer the perfect blend of form and intricate details. Far from just another course, this is your transformative guide to pushing the limits of Plasticity. Let's have a look.
Language: English + subtitle | Duration: 1h 34m 15s | Size: 215 MB
https://www.linkedin.com/learning/illustrator-digitizing-hand-lettering
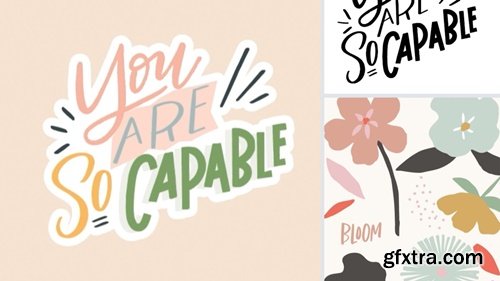
Explore the process of digitizing hand-lettered artwork and incorporating simple illustrations using Adobe Illustrator.
https://www.udemy.com/course/absolute-beginners-retopology-and-uv-unwrapping-in-3dsmax/
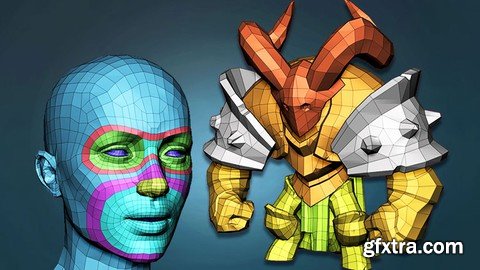
Learn the secrets of retopologizing in 3dsMax


Linkedin - InDesign: High-Volume Publishing with Data Merge
https://www.linkedin.com/learning/indesign-high-volume-publishing-with-data-merge
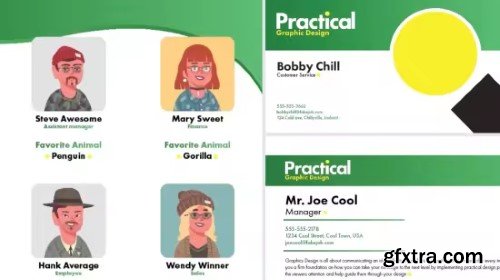
Many design jobs involve applying different data to the same design—for example, creating business cards for an entire team or creating catalogs or directories. This course from Skillshare explores the process of using Adobe InDesign’s Data Merge feature to efficiently produce high-volume layouts. Get started by explaining how to organize, format, and save data for seamless integration into InDesign. Learn how to apply variable text fields, troubleshoot common issues, and export designs for both print and digital platforms. Along the way, discover more advanced techniques for incorporating variable images and working with multiple record layouts.


Language: English (US)
A step by step creation of Architectural Visualization from scratch in Autodesk Maya - Modeling
https://www.udemy.com/course/architectural-visualization-in-maya-and-arnold-modeling/

Language: English (US)
Become an Expert Architect & Designer With AI
https://www.udemy.com/course/aitectstudio/

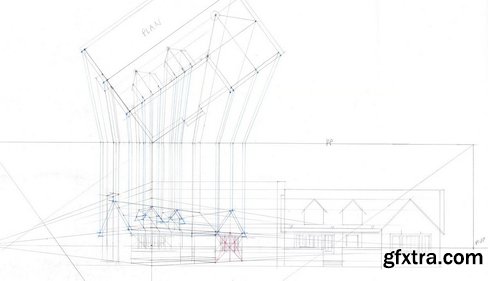
- A solid understanding of Perspective gives the artist the means to draw what they see both accurately and believably. This series on the Fundamentals of Perspective will provide artists with the understanding of not only the concepts but also puts them into practice as Illustration master Gary Meyer guides you through each exercise. In this lecture titled Fundamentals of Perspective 3: Three-Point Principles and Concepts, we begin by discussing three-point perspective. Here, Gary breaks down three-point perspective and illustrates the terminology and concepts to consider when using three-point perspective. We then move on to a variety of topics, starting with methods for plotting shadows in perspective using both natural and artificial light scenarios. The series ends with Gary discussing how to correctly plot reflections in both one and two-point perspective and ends by demonstrating how to plot and transfer scale in reflections.


Udemy - Efficient BIM Ducting Design with Revit and Dynamo

Skillshare - Mastering Your UI/UX Design Skills with Figma's Essential Features (2025)
In this course, "Master Your UI/UX Design Skills with Figma’s Essential Features", you will learn how to use Figma to create modern and interactive interfaces. Whether you're a beginner or an experienced designer, this course will guide you through Figma’s fundamental tools, prototyping, smart animations, color management, and more. Through hands-on exercises and real-world projects, you will develop an efficient workflow to design professional interfaces and enhance your UI/UX skills.


- This first half of the color course focuses on understanding color from the terms associated with color, how lights project color, choosing color schemes, and much more. We go into different discussions like why Red and Cyan are considered true complimentary colors instead of red and green.
- We begin first breaking down what is Color? Why is there confusion when figuring out what is considered Red? As we continue throughout this course we will constantly refer back to the three terms that better explain what color is. From there we dive into working digitally and the differences that brings when working with color projected with light rather than pigments. Once you begin understanding working in RGB (Red, Green, Blue) then it becomes easier understanding how colors mix in this digital format.
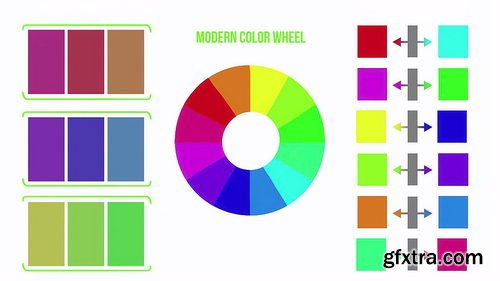
- Working with color, we need to understand the color wheels associated with art and the difference between the traditional and modern color wheels. We will then show you how to choose these colors accurately from within Photoshop. Then we take the time to look at the terms associated with color such as tint, tone, shade, monochromatic, greyscale, analogous, complimentary, and warm/cool. There are a lot of color terms but they are quite simple once you know the meaning of each.
- The last section in our understanding color course looks at creating basic color schemes and we have a guest appearance from one of our favorite color artists, Mel Herring giving her insights on working with color as well!
- The second half focuses on working with color. I often find it easier to understand new concepts by first recognizing I was doing something wrong in the first place. We will go through the common mistakes associated with color and how to go about correcting them. Then we go through color shifting using HSB and how to push it even further with fantastical intuition if you want to. From there we explain how important contrast is and having your color speak harmoniously with one another based on their relativity. After we talk about working with the perceptions of each color. In the last videos we touch on the importance of working with neutrals, how light affects color, and confidence!

Domestika - Guided Project: Bring Your Sketch to Life with Lighting and Color in Photoshop
https://www.domestika.org/en/courses/5712-guided-project-bring-your-sketch-to-life-with-lighting-and-color-in-photoshop
Audio: English, Spanish | Subtitles: English · Spanish · Portuguese · German · French · Italian · Polish · Dutch
In this Guided Project, we’ll begin painting our character, but first, we’ll cover a few essential preparatory steps. We’ll start by learning how to import your sketch into the computer properly, ensuring a smooth transition to digital painting. Next, we’ll explore the importance of a mood board—what it is, how to create one, and how it can serve as a valuable reference throughout the painting process. With these foundational elements in place, we’ll then dive into the exciting stage of applying color and bringing our character design to life. By the end of this Guided Project, you’ll have a solid starting point for your digital painting, equipped with the tools and knowledge needed to develop a polished and expressive final piece.

- Unlock the secrets to crafting iconic logos that leave a lasting impression. Begin by selecting a client or brand and delve into understanding their mission, values, and visual identity. This foundational research guides you in developing a logo concept that resonates with the core essence of the brand. Engage in structured exercises designed to stimulate creativity, helping you brainstorm and refine your ideas into compelling sketches. Explore how to transform these sketches into polished designs that effectively communicate the brand's message.
- The journey doesn't stop at concept development. Learn how to integrate typography seamlessly to enhance the logo's impact and ensure a balanced visual identity. Discover the importance of each design element and how they work together to create a cohesive and memorable logo. By the end, you'll have a clear, structured approach to logo design, enabling you to produce professional logos that stand out. Whether you're designing for a client or your own brand, gain the skills to turn abstract ideas into powerful symbols.
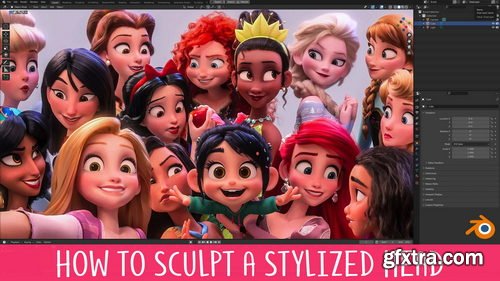
- You’ve probably been taught that sculpting the head starts with a sphere and ends with a head. That’s like reading a book without chapters! This unorganised approach makes the information more difficult to understand and retain.
- This course takes a different approach by breaking the process up into 8 manageable levels. You can think of these levels like checkpoints, and each builds on the one before it. This organises what you need to do and takes away much of the stress that comes with the daunting task of sculpting a head!
- Each level also becomes it’s own exercise, so you can really focus in on those areas you struggle most with!
- We all know the importance of using reference when working but 2D references are limiting, especially when you’re learning. Most of the time you have just a single image to work from. If you’re lucky you might have a character sheet that gives you Front, Side and 3/4 views. This is slightly better, but it’s far from ideal.
- The problem is that when you work in 3D you need to know how the model should look from any percievable angle, otherwise it falls apart. Unfortunately, character sheets don’t include references showing the model 37° to the left and 23° tiilted downwards.
- Having a 3D reference right there in the viewport removes any doubt by allowing you to rotate around the model however you like, whenever you like. I sincerely wish I had this when I was starting out.
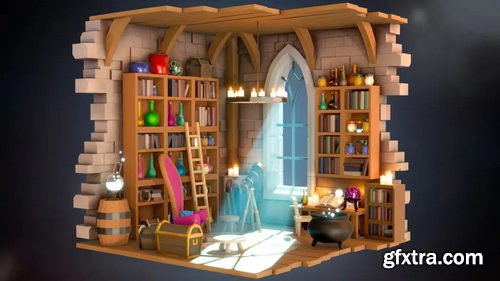
- Ever seen a cool isometric diorama and thought, "I wish I could make that"? Well, now you can! Our Blender Isometric Scene Creation course is designed so you to learn how to build those stunning scenes.
- In this course, you'll dive into Blender and master various modelling techniques, lighting, and rendering. You'll stack modifiers like a pro and use speed hacks to create awesome scenes faster than ever.
- We’ll guide you step-by-step through crafting isometric scenes, perfect for adding to your game dev portfolio. Imagine creating a magical wizard’s workshop or a cosy fantasy tavern, all in 3D!
- This course is perfect for beginners with a basic understanding of Blender. If you’ve made a few simple objects or taken a starter course, you’re ready to level up your skills and creativity!
- Not sure about complex tools? No worries! We focus on making things easier with tips and tricks for quick object creation and modifier use. Speed up your workflow and create stunning scenes in no time.
- You’ll learn to make objects that are easily adaptable, using techniques that save you time. Your scenes will look fantastic with advanced lighting, all without the hassle of a steep learning curve.
- Are you a game artist, designer, or just someone who loves 3D? This course is for you! It’s designed to help you create dynamic 3D environments for games or any other creative project.
- Join us and turn your ideas into reality. With our easy-to-follow lessons, you’ll quickly go from Blender beginner to isometric scene expert.
- Ready to start crafting your own magical worlds? Let’s go!
126,000 Royalty-Free 3D Model
Udemy Türkçe


Top Rated News
- CreativeLive Tutorial Collections
- Fasttracktutorials Course
- Chaos Cosmos Library
- MRMockup - Mockup Bundle
- Finding North Photography
- Sean Archer
- John Gress Photography
- Motion Science
- AwTeaches
- Learn Squared
- PhotoWhoa
- Houdini-Course
- Photigy
- August Dering Photography
- StudioGuti
- Creatoom
- Creature Art Teacher
- Creator Foundry
- Patreon Collections
- Udemy - Turkce
- BigFilms
- Jerry Ghionis
- ACIDBITE
- BigMediumSmall
- Globe Plants
- Unleashed Education
- The School of Photography
- Visual Education
- LeartesStudios - Cosmos
- Fxphd
- All Veer Fancy Collection!
- All OJO Images
- All ZZVe Vectors
- CGTrader 1 CGTrader 2


