
Language: English (US) | Duration: 1h 27m | Skill level: Intermediate | Released: 2/7/2025
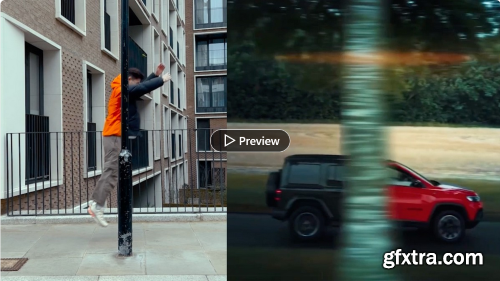
You're scrolling through social media and come across a video with transitions and effects that leave you wondering "How on earth did they pull that off?!" Wonder no more. Keenan Lam is a cinematographer and editor with over 100k followers on Instagram who frequently gets that question. He uses video masking—a video editing technique that allows you to hide specific areas of a video, blend images together, or add other video effects—to add a creative twist to his personal videos and collaborations with top brands like Xbox, Panasonic, and Porsche. Join Keenan as he reveals the many possibilities of video masking and teaches you how to use masking to blur out objects, build titles, and create scroll-stopping special effects.


Whether you are just starting or looking to brush up on the basics, this course covers everything you need to confidently edit videos in Adobe Premiere Pro
Duration: 2h 51m | Skill level: Beginner | Language: English (US)


Many of us have been in a situation where a client asks for a colorful, undulating background to place behind titles. They are surprisingly simple to make in Fusion. You can animate one while your client is getting coffee.
Fusion may not be the first tool that comes to mind when thinking of motion graphics. However, the 3D environment in Fusion is fast and relatively easy to use for creating abstract animated backgrounds.
In this Insight, you’ll learn to use random noise to deform Fusion-generated geometric solids. When lit with colored lights the transparent faces of the moving 3D objects create an abstract play of light, form, and color. This randomness adds to the unique look of each background.
With a little image filtering help, these animated clips make perfect backgrounds for text, product images, or anything else that may require a background.
")


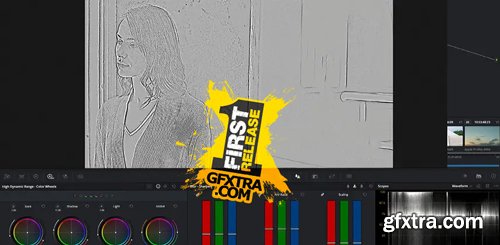
This tutorial was designed for beginning to intermediate Resolve users who want to work faster while improving the look of their footage. This tutorial assumes a basic familiarity with the DaVinci Resolve 17/18 user interface. Users who need a foundational understanding of DaVinci Resolve should watch DaVinci Resolve 18 Core Training.
Software Version: DaVinci Resolve 18 or later. Run Time: 7 hours 6 minutes Type of Tutorial: Beginner Project Media: Project media is included.


In this course, you will learn how to bring street art to life by turning still images into eye-catching animations using Adobe Premiere Pro and Photoshop. We'll guide you through the entire process, from choosing the right image to animating individual elements like feathers, eyes, and stars. By mastering keyframes, layers, and special effects, you'll be able to create smooth, professional-looking animations that stand out. You’ll also learn how to enhance colors, clean up images, and work with advanced animation techniques that add depth and movement to your artwork. This course is designed for intermediate users who already have a basic understanding of both Premiere Pro and Photoshop. Whether you're a video editor, digital artist, or content creator, these techniques will give your projects a unique edge.

Language: Deutsch, English (US), Español (España), Italiano, 한국어, Nederlands, Polski, Português (Brasil), 中文(简体)
DaVinci Resolve: Learn Video Editing, Color Correction, Color Grading, Visual Effects in DaVinci Resolve latest versions
https://www.udemy.com/course/davinci-resolve-training-course/
Hello there!
I'm Louay, a seasoned instructor specializing in Premiere Pro, After Effects, Video Editing, and Motion Graphics courses, which are highly rated and bestselling.

FXPHD - DIR301 - Directing
https://www.fxphd.com/details/184/
In this course, award winning Jason Wingrove provide his experience in what it takes to direct. Wingrove has years of experience gaining brilliant performances from actors, children and telling stories that have a humanity and warmth. Wingrove works primarily as a TVC director, having started his career in the Camera department and worked his way up. Many of you will know Wingrove from the fxguide Red Centre podcasts and we have had numerous requests for Wingrove to work through a real production from pre to post.
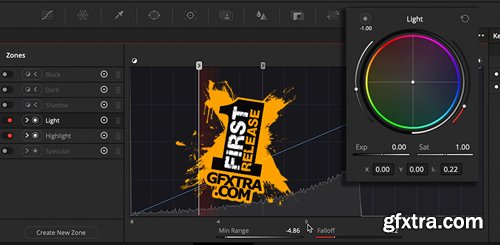
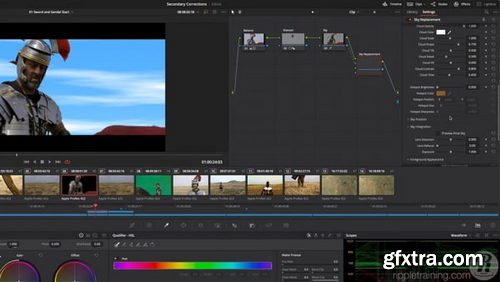
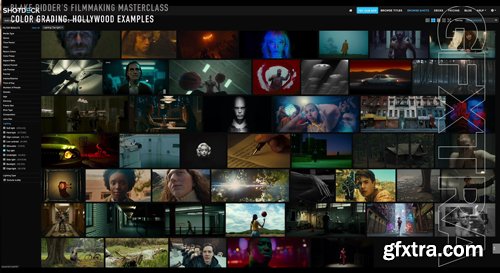
Welcome to my course, where I will guide you through reverse engineering a grade from scratch using behind-the-scenes images. These images are captured with still cameras, while the films were shot on various cinema cameras, each with its own color science. The goal of this course isn’t to perfectly match a single frame. Instead, we will focus on analyzing the scopes and building a simple node tree to achieve a look similar to the original film.
We will explore the popular “orange and teal” techniques, and I will share my perspective on the most effective and visually pleasing ways to create a complementary color scheme. This includes developing a basic node tree that allows us to replicate the looks of different movies using a minimalist approach.The objective is not just to imitate, but to examine scopes, deepen your understanding of color harmony, and adopt a straightforward, efficient method. This approach will enable you to work quickly and consistently.


126,000 Royalty-Free 3D Model

Udemy Türkçe


Top Rated News
- CreativeLive Tutorial Collections
- Fasttracktutorials Course
- Chaos Cosmos Library
- MRMockup - Mockup Bundle
- Finding North Photography
- Sean Archer
- John Gress Photography
- Motion Science
- AwTeaches
- Learn Squared
- PhotoWhoa
- Houdini-Course
- Photigy
- August Dering Photography
- StudioGuti
- Creatoom
- Creature Art Teacher
- Creator Foundry
- Patreon Collections
- Udemy - Turkce
- BigFilms
- Jerry Ghionis
- ACIDBITE
- BigMediumSmall
- Globe Plants
- Unleashed Education
- The School of Photography
- Visual Education
- LeartesStudios - Cosmos
- Fxphd
- All Veer Fancy Collection!
- All OJO Images
- All ZZVe Vectors
- CGTrader 1 CGTrader 2


