

This tutorial was designed for beginning to intermediate Resolve users who want to work faster while improving the look of their footage. This tutorial assumes a basic familiarity with the DaVinci Resolve 17/18 user interface. Users who need a foundational understanding of DaVinci Resolve should watch DaVinci Resolve 18 Core Training.
Software Version: DaVinci Resolve 18 or later. Run Time: 7 hours 6 minutes Type of Tutorial: Beginner Project Media: Project media is included.
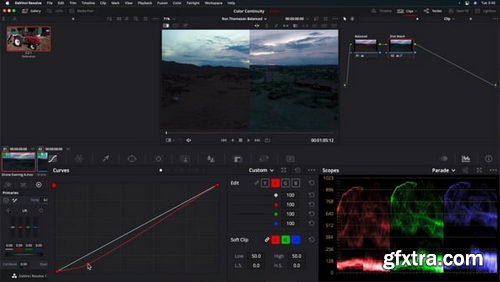
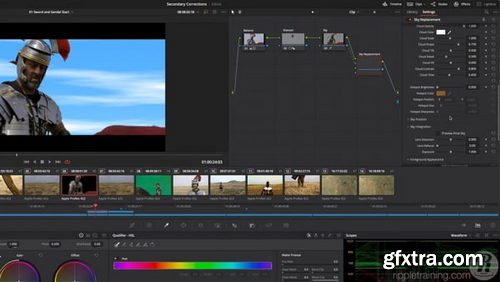
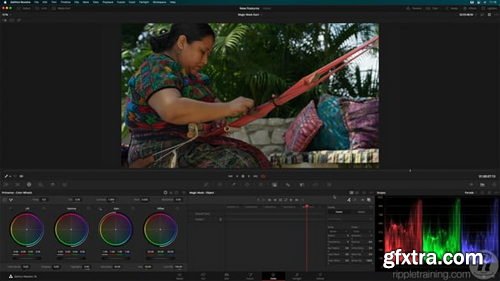
Advanced Color Grading in DaVinci Resolve 17/18 1. Introduction 2. Opening a Resolve Archive ● Opening an Archive ● Grading Workflow Steps ● Balancing Shots ● Shot Matching ● Secondary Grading ● Creating a Look 3. Setting Tonal Range & Contrast ● Picking Black & White Points ● Refining Contrast with Master Wheels ● Adjusting Contrast & Pivot ● Adjusting Contrast Controls in Settings 4. Setting Contrast with more Flexibility ● Using Curves ● Pop-out Curve Palette ● Unganging Luminance ● Adding Control Points ● Curves vs. Wheels 5. Balancing Colors ● Adjusting Tonal Range with the Custom Curve ● Balancing Color with Curves ● Adjusting Tonal Range and Balancing Color with the Primaries Wheels ● Normalizing a Shot with Color Match 6. Understanding Log & Color Wheels ● Using Primaries and Log Wheels on a Gradient ● Adjust Log Master Wheel Ranges ● Combining Primaries Wheels and Log Wheels Corrections 7. Building a Shot Matching Strategy 8. Organizing with Flags & Filters ● Changing Default Flag Color ● Flags and Clip Instances ● Filtering the Timeline with Flags ● Markers vs. Flags 9. Matching Shots with Shot Match & Color Bars ● Automatic Shot Matching ● Adding a Shot-Matching Node ● Matching Shots with Stills ● Creating a Keyboard Shortcut for Labeling Nodes ● Wiping a Still ● Resizing Shots ● Shot Matching with the Color Bars 10. Shot Matching with Curves ● How to use the RGB Parade when Matching Shots ● Wiping a Timeline Clip ● Shot Matching with Curves ● Understanding Lum Mix ● Matching the Skies ● Comparing Shots with a Split Screen ● Multiple Playhead Split Screen Mode 11. Controlling the Viewer's Eye ● Working with Power Windows ● Correcting Outside a Window ● Creating Shallow Depth of Field with Tilt-Shift Blur ● Creating a Vignette Effect with a Power Window ● Saving a Window Grade as a Preset ● Using a Depth Matte to Isolate Areas for Correction 12. Sharpening & Tracking Key Elements ● Using the Blur & Sharpen Palette ● Evaluating Sharpening ● Isolating Sharpening with a Power Window ● Tracking a Power Window ● Manually Tracking in Frame Mode 13. Fixing Overcast Skies ● Using a Qualifier ● Grading the Qualified Sky ● Replacing a Sky ● Creating and Connecting an Alpha Output ● Clip Resizing ● Using the Sky Replacement Effect ● Using a Gradient Power Window ● Combining Qualifiers and Power Windows ● Adding Atmosphere 14. Warping Colors to a Target ● The Color Warper Palette ● Working with Hue and Saturation Graph ● Refining Selections with Mesh Density ● Using Tools, Range, and Auto Lock ● Selecting Skin Tones ● Working with the Chroma-Luma Graph 15. Face Refinement ● Applying the Face Refinement Effect ● Facial Feature Analysis ● Checking and Adjusting the Matte ● Improving Skin Quality ● Face Refinement Color Grading Parameters ● Retouching Parameters ● Blending in Facial Adjustments ● Face Refinement on a Different Subject 16. Adjusting Skin Tones Manually ● Color Grading Workflow Review ● Grading Skin Tones with HSL Curves ● Using the Hue vs. Hue Curve ● Using the Hue vs. Sat Curve ● Using the Luma vs. Sat Curve ● Using the Sat vs Lum Curve ● Softening & Sharpening Skin 17. Importing an XML Timeline ● Understanding Conforming ● Creating a New Project ● Importing an XML File ● Reviewing the Imported Timeline and Media 18. Syncing an Offline Reference ● Importing a Reference Movie ● Linking the Reference Movie ● Displaying the Reference Movie ● Addressing Media Offline Warnings ● Changing Reference Movie Starting Timecode ● Matching Color Spaces 19. Conforming a Timeline ● Replacing a Missing Clip with Conform Lock ● Comparing Shots ● Using Wipe Modes to Compare Clips ● Viewer Wipe Modes ● Transforming a Clip with a Difference Wipe ● Stepping Through Clips 20. Reconforming to HQ Footage ● Proxy vs. Full Quality media ● Disabling File Media Path Lock ● Reconforming from Media Storage 21. Generating Proxy Media ● Settings for Creating Proxy Media ● Generating & Confirming Proxies ● Linking to Proxies Generated Elsewhere ● Playing Proxy Media ● Creating a Proxy-Only Archive for Remote Editing ● Using the Blackmagic Proxy Generator 22. Color Managed Workflow ● Rec. 709 and Log Gamma Curves ● Using a LUT with Log-encoded Clips ● Using the Color Space Transform OFX Node ● Color Space Transforms vs. LUTs ● Setting up Resolve Color Management ● Setting the Input Color Space Manually ● RCM Preset Detailed Settings ● Working with the DaVinci Wide Gamut Preset ● RCM & Color-space aware grading tools ● Summarizing Color Management 23. Working with Local Versions ● Reading Stills Numbering ● Applying a Grade from a Still ● Creating a Cross Process Look ● Renaming Local Versions ● Creating Multiple Local Versions ● Resetting Nodes and Grades ● Applying a Bleach Bypass Look ● Selecting Local Versions ● Using a Split Screen to compare Versions ● Local vs. Remote Versions 24. Appending Grades & Nodes ● Shot Matching before Applying Looks ● Appending a Node Graph ● Copying Individual Nodes from a Still ● Copy/Pasting Individual Nodes ● Copy/Pasting Specific Attributes 25. Using Shared Nodes ● Shared Nodes Explained ● Saving a Shared Node ● Applying Shared Nodes ● Modifying the Grade on a Shared Node ● Adding a Vignette via a Shared Node ● An Alternate Method for Applying Shared Nodes ● Using Split Screen to Adjust Multiple Shared Nodes 26. Saving Grades for Other Projects ● Using the PowerGrade Album ● Creating Project Memories ● Using Unmix ● Applying PowerGrade Album Stills ● Exporting Stills ● Importing a Still ● Exporting with a Display LUT ● Workflow Options for Working with Stills 27. Rippling Grades from Shot to Shot ● Understanding Node Numbering ● Rippling Node Changes ● Rippling Node Changes to Groups 28. Copying Grades Using ColorTrace ● Comparing Starting Timelines ● Starting Color Trace ● Setting the Source Timeline ● Effects and Definitions ● Automatic and Manual Modes ● Color Trace Color Coding ● Copying the Grades ● Manually Matching Clips ● Verifying the Grade 29. Copying Grades Using the Timelines Album ● Setting the Target ● Using the Timelines Album 30. Using Remote Versions ● Remote vs. Local Versions ● Loading the Remote Version ● Creating a Remote Grade ● Setting All Clips to use Remote Versions ● Clip-based Undo ● Grading Remote Versions ● Excluding a Clip from a Remote Grade ● Renaming a Remote Version 31. Applying Remote Grades to a New Cut ● Reviewing the Ungraded Stringout ● Fast Review ● Setting the Timeline to use Remote Grades ● Apply a Grade with PowerGrade Album Presets ● Importing an Edited Timeline ● Auto-grading Imported Timelines with Remote Grades 32. Understanding Node-Based Corrections ● The Anatomy of a Node ● Understanding Node Order ● Color, Luminance and Saturation Across Nodes 33. Adjusting Contrast & Luminance on Nodes ● Crushing the Shadows ● Attempting to Recover Lost Shadow Detail ● Is Color Information Really Lost? 34. Dominant Color Grades & Surrounding Nodes ● Creating a Cold Look ● Exempting Skin Tones from a Look Grade ● Impact of a Look Grade on Qualifying ● Refining the Qualification ● Limiting Qualifier with a Power Window ● Node Order Impact on a Qualified Grade Before a Look Grade 35. The Parallel Mixer Node ● Working with the Parallel Mixer Node ● Morphing into a Layer Mixer Node ● Adjusting a Grade for the Layer Mixer Node ● Mixer Nodes Summary 36. Visualizing Mixer Nodes ● Adding a Generator and Making it Gradable ● Creating 3 Layer Mixer Nodes ● Mixing Colors with Power Windows ● Understanding Layer Mixer Nodes ● Changing Layer Mixer Composite Modes ● Reordering Layer Mixer Nodes ● Understanding Parallel Mixer Nodes 37. The Layer Mixer Node ● Creating a Stylized Look ● Grading the Water ● Isolating the Water ● Grading the Foliage ● Grading the Foreground Elements ● Sharing a Matte Between Nodes ● Isolating and Grading the Towel ● Creating and Working With Compound Nodes 38. Applying Transparency to Video Tracks ● Stacked Clips in the Edit Page ● Adding an Alpha Output ● Keying a Shot with the 3D Qualifier ● Finessing the Matte ● Eliminating Spill ● Eliminating the Boom Mic ● Grading the Foreground 39. Importing & Using an External Matte ● Importing and Associating an External Matte ● Adding the External Matte Node ● Passing Transparency to the Output Node ● Tracking to a Background Plate ● Creating a Compound Clip for Grading 40. Making Corrections with the Magic Mask ● Isolating a Person ● Tracking & Refining the Mask ● Isolating Skin with Magic Mask and a Qualifier ● Isolating Clothing ● Isolating Multiple Elements ● Isolating Objects 41. DaVinci Resolve Processing Pipeline 42. Using Scene Cut Detection ● About Scene Cut Detection ● Creating a New Project and Running Scene Cut Detection ● The Scene Detect Window ● Analyzing the Video Clip ● Checking and Adjusting Cut Points ● Removing Dissolve Cut Points ● Working with the Cutoff Line ● Adding Cuts to the Media Pool ● Adding Cut Clips to a New Timeline in Correct Order 43. Timeline Resolution & Aspect Ratios ● Flagging and Filtering Key Clips ● Adding a Saved Vignette Window ● Changing Timeline Resolution ● Ways to Leverage Resolution Changes ● Upscaling with Super Scale ● Down-scaling for Playback Performance when Editing ● Applying Blanking 44. Reframing Individual Clips ● Sizing Clips with Input Sizing ● Output Sizing ● Other Sizing Options ● Compositing with Node Sizing and a Mixer Node 45. Removing Objects with Patch Replacer or Node Sizing ● Using the Patch Replacer Effect ● Tracking the Patch Replacer ● Replacing Objects with Node Sizing ● Tracking the Power Window ● Blending the Patch by Softening and Grading 46. Using Object Removal ● Tracking the Object ● Applying the Object Removal Effect ● Scene Analysis ● Improving the Result ● Adding Localized Blur 47. Keyframing ● Animating Sizing with Keyframes ● Activating Animation ● Adjusting Keyframes ● Adjusting Dynamic Attributes ● Animating Color Corrections ● Emphasizing Time of Day with a Grade ● Static Keyframes ● Keyframing Resolve FX 48. Applying Noise Reduction ● Where in the Node Tree to Apply Noise Reduction ● Working in the Motion Effects Palette ● Working with Temporal Noise Reduction ● Setting Temporal Threshold ● Working with Spatial Noise Reduction ● Changing Noise Reduction Node Order ● Noise Reduction and Playback Performance ● NR available as ResolveFX on Edit page 49. Using Render Cache ● Source and Sequence Caching with Smart Cache ● Node Caching ● Understanding the User Cache Mode ● Manually Caching Node Trees ● Configuring Cache Quality ● Clearing a Cache ● Render Cache Order Changes 50. Creating a Group ● Grouping Clips ● Changing the Thumbnail Image ● Filtering Clips by Group ● Grading Grouped Clips Individually ● Groups and the Classic Grading Workflow 51. Apply Base Grades to Pre-Clip Group ● Understanding the Current Group ● Identifying a Representative Group Clip for Grading ● Normalizing a Group in Pre-Clip Mode 52. Adjustments at the Clip Group Level ● Setting Clip Mode ● Balancing and Secondary Corrections in Clip Mode ● Comparing Clips with a Wipe 53. Creating a Look at the Post-Clip Group Level ● Setting up for a Post-Clip Group Grade ● Importing and Analyzing a Reference Shot ● Grading to Match a Reference ● Returning to Clip Mode to Adjust a Grade ● Using the Sat vs. Luma Curve 54. Applying Timeline Level Grades ● Adding Film Grain ● Adding Blanking in Timeline Mode ● Adding a Data Burn-in 55. Adjusting RAW Settings at the Project Level ● Identifying RAW Clips ● Debayering RAW Files ● Debayering at the Project Level ● Grading Log-encoded Clips to Rec. 709 ● Grading Rec. 709-encoded Clips ● Recovering Clipped Luminance Data ● Changing RAW Settings at the Clip Level ● Copying Custom RAW Settings ● Using Color Management with RAW Footage 56. Working with BlackMagic RAW ● What is BlackMagic RAW? ● Importing a .braw Clip ● Setting RAW Project Settings ● Working in the Camera RAW Palette ● Understanding Gamma Options 57. Using the HDR Palette ● HDR Palette vs. Wheels and Log Panels ● HDR Palette and Zone Graph Overview ● Setting up RCM for Log and RAW clips ● Zone-based Corrections ● Adjusting Zone Range and Falloff 58. Using Lightbox for Quality Control ● Using the Lightbox to Review Grading Status ● Filtering the Lightbox ● Reordering Clips ● Creating Custom Filters ● All-project Smart Filters 59. Render Workflow & Presets ● Setting the Video Output Format ● Understanding Render Presets ● Customizing a Video Preset ● Setting the Timeline Render Range ● Adding a Job to the Render Queue and Rendering 60. Custom Renders & Saving Presets ● Modifying the Custom Preset for Dailies Delivery ● Saving Customized Render Settings as a New Preset 61. Configuring a Timeline for Digital Cinema ● What is a DCP? ● EasyDCP Plugin ● DCP-compliant Aspect Ratios, Frame Sizes & Rates ● Changing Timeline Resolution to be DCP-compliant 62. Rendering a DCP ● Render Settings for DCP Delivery ● Setting the Composition Name ● Output Destination Requirements 63. Using Commercial Workflow to Export Versions ● Version Rendering Options ● Setting the Render Range ● Render Settings for Versions ● Enabling Flat Pass ● Rendering Versions 64. Advanced Render Settings ● Setting Quality ● Setting Keyframes ● Cinemascope ● Setting Data Levels ● Data burn-in ● Enable Flat Pass ● Showing All Jobs in the Render Queue


126,000 Royalty-Free 3D Model
Udemy Türkçe


Top Rated News
- CreativeLive Tutorial Collections
- Fasttracktutorials Course
- Chaos Cosmos Library
- MRMockup - Mockup Bundle
- Finding North Photography
- Sean Archer
- John Gress Photography
- Motion Science
- AwTeaches
- Learn Squared
- PhotoWhoa
- Houdini-Course
- Photigy
- August Dering Photography
- StudioGuti
- Creatoom
- Creature Art Teacher
- Creator Foundry
- Patreon Collections
- Udemy - Turkce
- BigFilms
- Jerry Ghionis
- ACIDBITE
- BigMediumSmall
- Globe Plants
- Unleashed Education
- The School of Photography
- Visual Education
- LeartesStudios - Cosmos
- Fxphd
- All Veer Fancy Collection!
- All OJO Images
- All ZZVe Vectors
- CGTrader 1 CGTrader 2


