Categories: Tutorials » Photography and Video
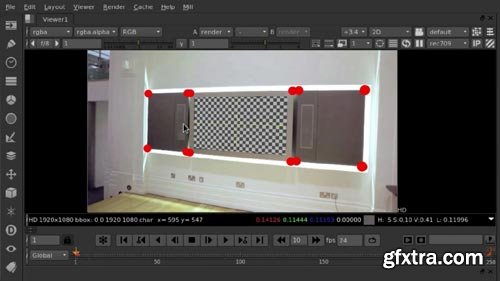
Advanced Production Techniques in 3DEqualizer and NUKE
1h 28m | FLV 1280x720 | Project Files | 800 MB
- In this tutorial, we'll learn how to use 3DEqualizer and NUKE together in a professional workflow for production. Throughout these lessons we'll look at the more advanced features of 3DEqualizer and how to utilize them with NUKE in a really effective way. We'll start by creating a 3D screen replacement, and then further utilize 3DEqualizer assets to stabilize shaky footage. Finally, we'll dive into correcting for rolling shutter artifacts. By the end of this course, you will be well-equipped to handle a 3DEqualizer to NUKE workflow effectively. Software required: NUKE 8, 3DEqualizer4 R3.

Advanced Modeling Techniques with Fusion 360
7h 28m | FLV 1280x720 | Project Files | 3.4 GB
- In this course, we will use the powerful modeling tools available in Fusion 360. Solid body modeling offers several distinct advantages for hard surface applications not available in more traditional modeling tools, like Maya and ZBrush. This tutorial series will demonstrate a variety of strategies and workflows to creating highly detailed and accurate hard surface models. Over the course, we will build a pistol from start to finish, covering each new piece of geometry, as well as solutions to various modeling challenges along the way. The tutorial series will conclude with converting the exported STL files into OBJ files using Maya and ZBrush. Software requested: Autodesk Fusion 360, Maya 2015, ZBrush 4r7.
Advanced Editor Scripting in Unity and MonoDevelop
1h 53m | FLV 1280x720 | Project Files | 697 MB
- In this Unity tutorial, we'll learn several skills that will allow us to create menus and wizards that integrate directly into Unity's editor interface. We'll start with the basics of how to insert menus into Unity's menu interface. Then we'll move on to learning how to write our own wizards that allow us to automate tasks. By the end of this Unity training you'll have the knowledge you need to create your own menu items, keyboard shortcuts, and powerful time-saving wizards that will boost your game development into overdrive. Software required: Unity 4.5, MonoDevelop.
Advanced Editing Workflows in Lightroom
1h 33m | FLV 1280x720 | Project Files | 1.9 GB
- In this Lightroom tutorial, we'll look at some real-world tips and techniques for enhancing your photographs. Lightroom is much more than just a replacement for Camera Raw and Bridge. It's a powerful tool, capable of eliminating your need for other image-editing software such as Photoshop. By the end of this Lightroom training, you'll have learned a variety of advanced features so that you'll not only speed up your workflow but also make it more efficient. Software required: Adobe Lightroom CC.
Categories: GFXTRA Special » Special Fonts
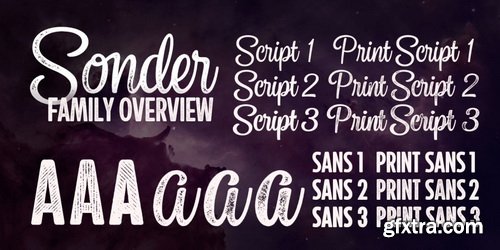
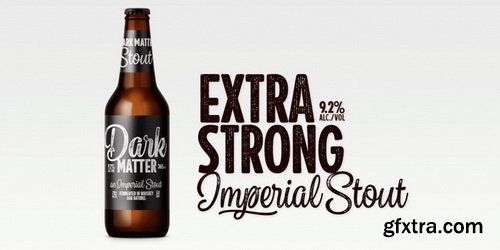
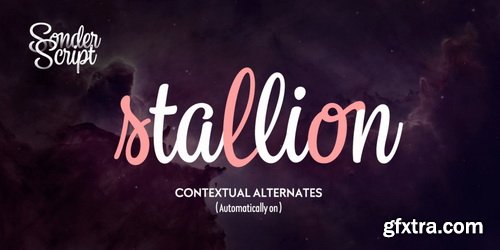
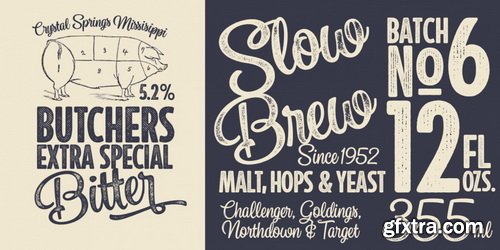


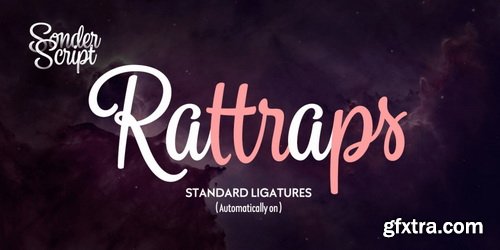

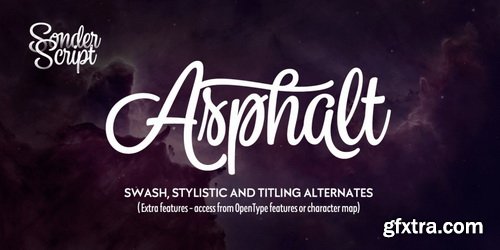


Sonder Font Family | 14 x TTF
https://www.fontspring.com/fonts/fenotype/sonder
- Sonder is a smooth brush Scrit and condensed Sans family of three weights on both. Both Script and Sans work as standalone fonts but they’re designed to go nicely together. Combine with Sonder Extras for smooth brush strokes for ambitious headlines, logos & posters.
Categories: Tutorials » Photography and Video
Advanced Editing Theories and Techniques in Premiere Pro
1h 24m | FLV 1280x720 | Project Files | 4.6 GB
- Throughout these lessons, we will dive deep into advanced video editing methods and techniques. Professional editors know several secrets such as the "5 Rules of Editing" and "Eisenstein's Theories of Montage". Once you know these theories and other editing techniques, you'll be able to take your editing skills to the next level. These theories and techniques will improve your abilities as an editor immensely. Software required: Adobe Premiere Pro CS6.

Advanced Character Modeling in Maya
3h 54m | FLV 1280x720 | Project Files | 1.6 GB
- In this tutorial, we will learn advanced techniques for modeling a feature-quality character in Maya. Throughout these lessons, we will explore techniques for creating organic and hard surface objects. We will look at ways for creating strong edge flow that will help with deforming our character. We'll also use Maya to create and lay out our UV's. By the end of this course, you will have a solid understanding of the techniques needed to speed up your modeling workflow for creating feature quality models. Software required: Maya 2012.
VRay Interior Workshop
6h00m | MP4 1280x720 | Project Files | 2 GB

Unreal Engine 4 VR Interior Tour with 3DsMax VRay
5h30m | MP4 1280x720 | Project Files | 2.5 GB
Categories: Tutorials » Other Tutorials

3D Jewellery Visualization
- We’ll begin by checking out some physical equipment that is more or less essential for jewellery re-production, we’ll have a closer look at some real jewellery and talk about precious metals.

Adding Keyframe Animation to Motion Capture in Maya
2h 4m | Video: FLV 1280x720 30fps | Audio: AAC 44.1KHz 2ch | 735 MB
- Throughout these tutorials, we'll go through the process of creating custom 3D character animation in Maya to work within established motion capture clips. We'll discuss the concerns of keyframe 3D animation to be used in tandem with motion capture data, planning the custom animation, and the importance of reference. Next, we'll modify a character rig to be used in conjunction with a motion capture skeleton. Then, we'll create key poses, animating the root and feet, animating the spine and head, animating the arms and hands and doing final polish of the animation. By the end of this tutorial, you'll have a more thorough understanding of how to create a custom, 3D character animation that fits seamlessly with motion capture animation. Software required: Autodesk Maya 2013.

Adding Dynamics to a Mermaid Animation with Bifrost in Maya
3h 3m | Video: FLV 1280x720 30fps | Audio: AAC 44.1KHz 2ch | 1 GB
- Throughout these Maya tutorials, we'll look into the process of taking a short animation and enhancing it dramatically with dynamic water and hair. As our mermaid emerges from the ocean we'll enlist the help of one of Maya's newest tools, Bifrost, to quickly and easily simulate the water around her to generate a realistic splash. In addition to this we'll also investigate the use of nHair to give her long flowing locks which also animate as she moves. By the end of this Maya training, you'll understand more key tricks and shortcuts essential to produce a still image or an animated sequence. Software required: Maya 2015.
Categories: Tutorials » Photography and Video

Action Scene Editing Techniques
1h 30m | Video: FLV 1280x720 30fps | Audio: AAC 44.1KHz 2ch | 2 GB
- Throughout these lessons, we'll delve into the considerations an editor needs to take when working with action scenes. We will examine footage from both documentary/sports style footage and edits as well as fictional action scenes. We cover considerations for this type of editing, common practices, and techniques to make your action scenes flow well. After this course, you will have the tools and knowledge to start putting together successful action scenes. Software required: Adobe Premiere Pro CC.

Accelerating The Face Rigging Process in Maya
4h 31m | Video: FLV 1280x720 30fps | Audio: AAC 44.1KHz 2ch | 2 GB
- In this Maya tutorial, we'll explore node-centric, pose-based deformers as drivers for corrective blend shapes. We'll learn how to accelerate the rigging process by using a free MEL script called abAutoRig.mel, as well as several code snippets and Python utilities to create a character rig, skin the model, paint weights, and apply corrective blend shapes. By the end of this Maya training, you'll have learned new strategies for completing the rigging process quickly and efficiently. Software required: Maya 2015, abAutoRig 6.0.3.

Accelerating The Character Rigging Process in Maya
4h 31m | Video: FLV 1280x720 30fps | Audio: AAC 44.1KHz 2ch | 2 GB
- Throughout these lessons, you will learn how to accelerate the rigging process by using a free MEL script called abAutoRig.mel as well as several code snippets and Python utilities to create a character rig, skin the model, paint weights, and apply corrective blend shapes. This course will introduce you to some new thoughts and strategies for completing these tasks quickly and efficiently. We will explore Maya node-centric pose based deformers as drivers for corrective blendshapes. Software required: Maya 2015, abAutoRig 6.0.3.

3Ds Max To Motionbuilder Integration
2h 13m | Video: FLV 1280x720 30fps | Audio: AAC 44.1KHz 2ch | 1.6 GB
- In this set of tutorials we will explore inter-operability features between 3ds Max and MotionBuilder. We'll explore inter-operability features between the two applications as we learn how to retarget animation to Biped, CAT and custom rigs! We'll learn efficient ways animation can then be modified in both applications to improve character performances. In the end, you'll learn how to use the rigging and animation tools in both 3ds Max and MotionBuilder to retarget and enhance your character animations with time-saving techniques. Software Required: Autodesk 3ds Max 2013

3Ds Max 2012 Reference Library World Space Modifiers
1h 34m | Video: FLV 1280x720 30fps | Audio: AAC 44.1KHz 2ch | 500 MB
- In this series of 3ds Max tutorials, we will take an in depth look at the world space modifiers in 3ds Max. Each video in this collection of tutorials is a self-contained lesson centering on one of 3ds Max's world space modifiers. This means that these tutorials can be viewed in any order you wish, allowing you to jump straight to the content that is most beneficial to you. Over the course of these lessons, we will discuss all of the parameters and options found in 3ds Max's world space modifiers. Software required: 3ds Max 2012.

3D Concept Creation In V Ray For Maya
2h 5m | Video: FLV 1280x720 30fps | Audio: AAC 44.1KHz 2ch | 810 MB
- In this V-Ray for Maya tutorial, we'll explore the techniques involved in creating a 3D concept creation. We'll start by using image-based lighting to setup advanced lighting and shading techniques within V-Ray for Maya. Then we'll use MARI to texture assets, followed by creating our final concept using NUKE. By the end of this V-Ray for Maya training, you'll have a solid understanding of the workflow that is required to create a working 3D concept in V-Ray for Maya and NUKE. Software required: Maya 2014, V-Ray 2.4 for Maya, NUKE 9.2X.

3D Assisted Facial Morphing in CINEMA 4D and NUKE
4h 11m | Video: FLV 1280x720 30fps | Audio: AAC 44.1KHz 2ch | 2.3 GB
- In this series of tutorials, we will go through the process of creating a human to mutant transformation using the MoGraph toolset in CINEMA 4D and then compositing the render in NUKE. We start with a very basic head mesh that we alter to match the features of our actress. We then use this mesh to create a spiky, scale ripple effect that will enhance the look of the change from human to mutant. We will learn some of the powerful Effectors that CINEMA 4D's MoGraph toolset has to offer and before you know it we are ready to render and move into NUKE. Once in NUKE, we begin merging our passes, shuffling alphas, and creating rotoscopes for the greatest control of our render. By the end of this tutorial, you will have a powerful technique for creating a shot that moves from two drastically different looking people and creating a transition that feels life-like and believable. Software required: CINEMA 4D R15, NUKE 7.0V6, After Effects CC 12.0.0.404
Categories: GFXTRA Special » Special Fonts
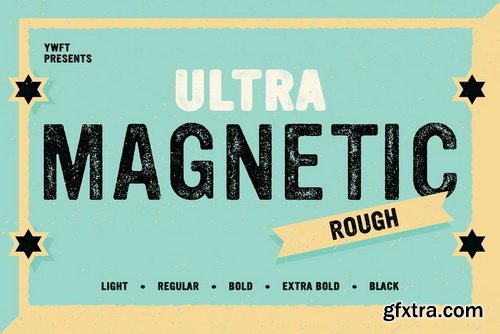
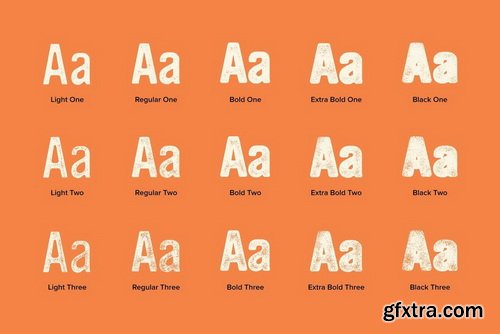


YWFT Ultramagnetic Rough Font Family | 15 x TTF
https://www.youworkforthem.com/font/T8626/ywft-ultramagnetic-rough/
- We grabbed the soft-yet-gothic Ultramagnetic while it was totally unaware, dragged it into the alley out back, and roughed it up somethin' fierce to create a tougher, edgier, and grittier version of one of YouWorkForThem's bestselling fonts.Ultramagnetic Rough features the same soft architecture as its predecessor, with varied distressing that increases in three stages. Wise beyond its years, it's more than earned its street-smarts. While Ultramagnetic Rough has hardened itself around the edges, deep down it remains a big old softie.
Categories: GFXTRA Special » Special Fonts


Forjada Font Family | 8 x TTF
https://www.youworkforthem.com/font/T8651/forjada/
- Forjada Family comes in 3 weights—Light, Regular and Bold—with matching italics and includes alternate swash caps and ligatures plus Ornaments and Catchwords sets that provide a wide range of choices for creating the most beautiful designs. The font character set supports 212 languages.Forjada is well-suited for branding, packaging, food & drinks menus, wedding invitations, party invitations, guidebooks to old cities or any glamorous design you want to add a fresh and modern touch to!
Categories: GFXTRA Special » Special Fonts
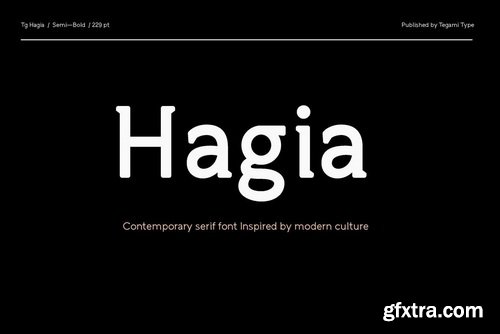
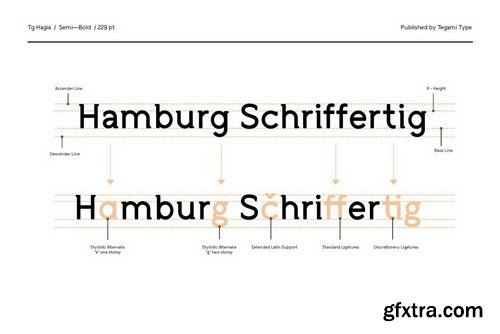
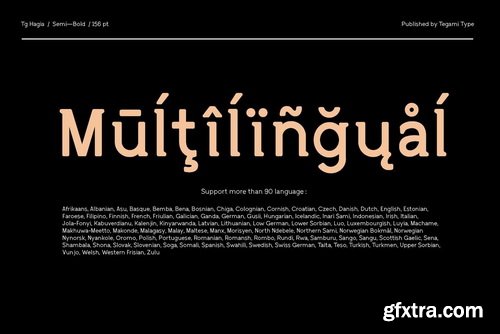
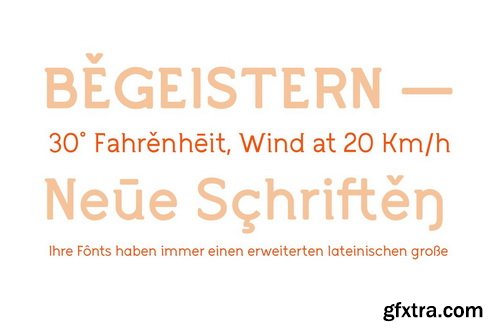
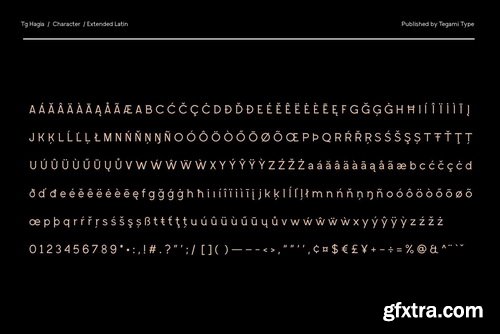
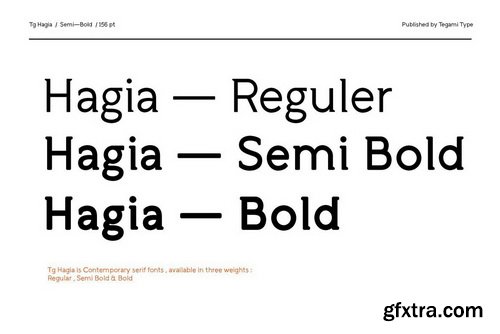
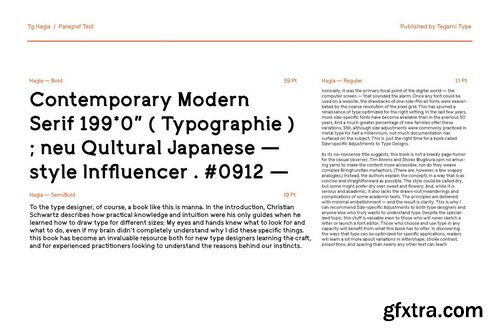
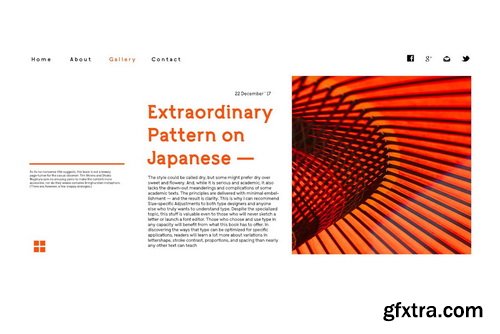
TG Hagia Font Family | 3 x TTF
https://www.youworkforthem.com/font/T8645/tg-hagia/
- Tg Hagia is contemporary serif font inspired by Modern Culture. This font is highly recommended for use as display and body text. Tg Hagia is available in three widths namely regular, semi-bold and bold
Categories: GFXTRA Special » Special Fonts

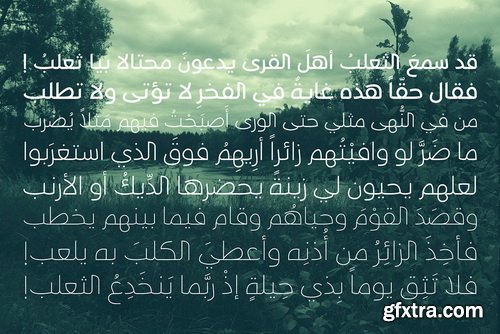

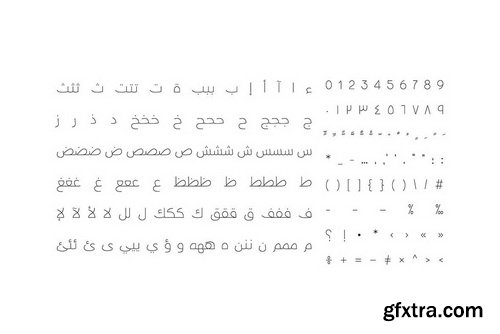

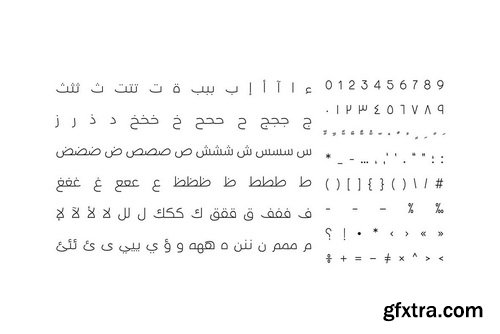
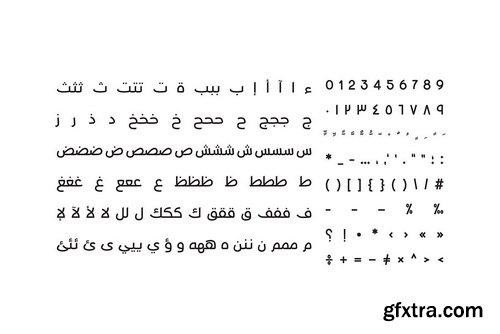
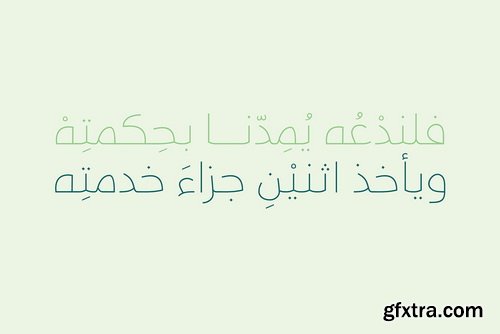
Taleeq Font Family | 3 x TTF
https://www.youworkforthem.com/font/T8629/taleeq/
- The word Taleeq is the Arabic for Fluent (or Freed). Taleeq is an Arabic typeface with a chirographic flavour. It consists of three weights and it suits various applications including publication, print and advertising.
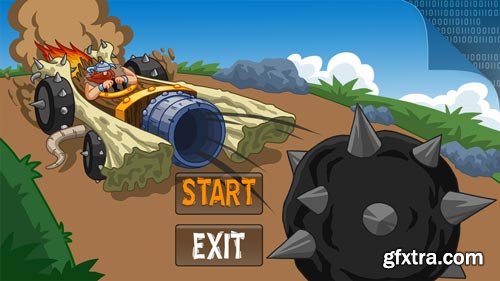
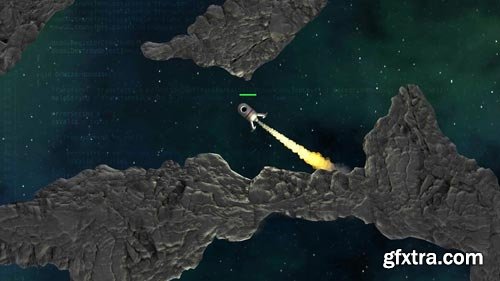
2D Racing Game Series in Unity: Volume 5
48m 57s | Video: FLV 1280x720 30fps | Audio: AAC 44.1KHz 2ch | 323 MB
Welcome to Volume 5 of the 2D Racing Game Series in Unity. In this tutorial, we will be discussing the final processes before packaging up our game. We'll start out by learning how to set up a main menu. Here we'll learn about how to display an image for our background and how to create the buttons needed to load our level or quit the game. From there, we'll discuss how to reduce memory usage by learning about the information displayed in the Stats window. Then we'll open the profiler and discuss how it can help us see any areas in our game that may be taking up too much memory. Here we'll also discuss some possible solutions, like consolidating scripts, that will reduce our memory usage. After that, we'll create a material manager script that will help us reduce the number of materials we have in our project, thus reducing the GPU usage. Then we'll wrap us the series by learning how to build our final version of the game. We'll discuss what options need to be set up in order to create a stand-alone version of your game that can then be distributed to your desired platform.
SermonBox - Seasonal Collection

SermonBox - The Series Pack Collection
Top Rated News


Would you like to be a Author?