
https://flippednormals.com/product/blender-from-ground-up-23629
- Hello everyone, I'm Marwan Hussein and I would like to welcome you to this new course, Blender is one of the very powerful 3D software on the market and it's free for everyone to use, when I started with Blender back in 2019 I didn't know the possibility of this software and what it could do, and when I start to learn it was amazing and easy to understand and it's so friendly for new users, especially the interface.
- Now almost all my online courses focus on Blender and how to create a lot of complex designs with it.
- In this new Blender course, I will go throw the most important things that every 3D artist should start with when it comes to using 3D software like Blender.
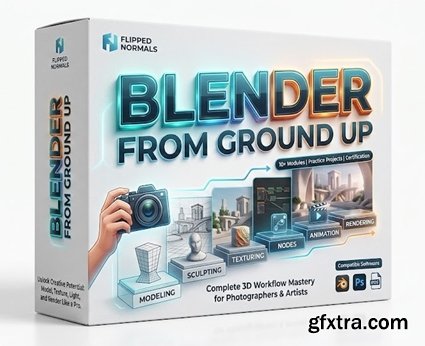
Course Overview We start by understanding the software interface, which is a very important first step. The good news is that Blender has a very friendly user interface. It is easy to understand and flexible, which means it is very easy to manage and customize. After that, we will begin learning how to add objects, move them, understand the navigation system of the software, and many other important features. Once we complete the fundamentals, we will move on to modeling. I divided the modeling section into four parts, starting from easy and gradually moving to more complex tasks. In the first section, we will learn how to create simple geometry. After that, in section two, we will create slightly more complex objects. Sections three and four will include more advanced scenarios and modeling challenges. Modeling means understanding your tools in order to create objects inside Blender. For example, if you want to create a simple table, you cannot do that unless you know your tools well. The modeling journey in this course is full of knowledge, and I dedicated a full section specifically to modeling. We will start with simple geometries, and as we move forward, we will gradually work with more complex objects. We will go through this process step by step. In the modeling section, I will use a new technique to explain each command. I will start by creating objects, and whenever I use a specific command to achieve something, I will provide a separate lecture explaining that command. This approach makes the learning process more fun and interactive. In the modeling section, we will cover the following topics: How to add objects and use the navigation system How to scale, rotate, and move objects Understanding object properties Object Mode and Edit Mode How to use Bevel in Edit Mode Object shading Face normals and selection types How to use Extrude in Edit Mode How to fix face normals in Blender Introduction to modifiers Solidify modifier Bevel modifier Inset Face command Transform orientation Transform pivot point Learning the Snap system in Blender How to use the Subdivision modifier Understanding Quads, Triangles, and N-Gons Delete and Merge menu Mirror and Lattice tools The modeling section does not stop here. There are many more topics included, and what I mentioned is just a small part of what we will cover. The modeling section is a long journey. After completing it, we will move on to unwrapping. Unwrapping is a very important technique that comes after modeling. It means preparing your model so that textures can be applied correctly. Without proper unwrapping, textures may appear distorted or applied in an incorrect way. Once that is done, it will be time to bring our models to life by adding materials. Adding materials is very important if you want to give your geometry life and make it look realistic. Materials allow you to add color to surfaces and control properties such as roughness or glossiness. You can make a surface look old or new, like glass or metal, and many other effects. We will use the models we created in the modeling section and apply materials to them step by step. After completing the materials section, we will move on to lighting. Lighting means adding light sources to your scene, just like in real life. Without lighting, you cannot create a render. In the lighting section, we will explore all lighting sources available in Blender, as well as environment lighting such as skylight and HDRI lighting. Lighting section topics include: Quick overview of light sources in Blender How to use Spotlight, Area Light, Point Light, and Sunlight How to use Emission lighting How to use HDRI lighting (High Dynamic Range Imaging) How to use Portal Lights What an IES light is and how to use it How to illuminate an interior scene using sunlight How to illuminate an interior scene using spotlights How to create volumetric lighting
All of these will be covered using both Cycles and Eevee. After that, we will learn how to use the camera. At this stage, everything in our scene will be ready, and the final step will be setting up a camera. Inside Blender, you cannot create a render without adding a camera, so it is very important to understand how to use it properly. At this point, we will have reached the end of the course. However, it is important to note that what you just read is only a brief introduction. The course includes 185 videos with a total of 48 hours and 30 minutes of content. After learning all the concepts, we will create a complete interior scene project together from start to finish. In this project, we will go through every step of the process—from modeling to rendering. We will create all the elements of the 3D scene, unwrap them, prepare them for materials, and complete everything step by step. After that, we will have reached the end of the course. I hope you find this course useful, and thank you for reading. Marwan Hussein


001_Introduction.part2.rar - 2.9 GB
001_Introduction.part3.rar - 2.9 GB
001_Introduction.part4.rar - 2.9 GB
001_Introduction.part5.rar - 2.9 GB
001_Introduction.part6.rar - 2.9 GB
001_Introduction.part7.rar - 1.6 GB
002_Unwrapping_section.rar - 2.4 GB
003_Materials_section.part1.rar - 2.9 GB
003_Materials_section.part2.rar - 2.9 GB
003_Materials_section.part3.rar - 700.4 MB
004_Lighting_Section.rar - 2.0 GB
005_Camera_section.rar - 286.2 MB
006_Interior_project.part1.rar - 2.9 GB
006_Interior_project.part2.rar - 1.8 GB
007_Project_folder.rar - 775.2 MB

126,000 Royalty-Free 3D Model
Udemy Türkçe


Top Rated News
- CreativeLive Tutorial Collections
- Fasttracktutorials Course
- Chaos Cosmos Library
- MRMockup - Mockup Bundle
- Finding North Photography
- Sean Archer
- John Gress Photography
- Motion Science
- AwTeaches
- Learn Squared
- PhotoWhoa
- Houdini-Course
- Photigy
- August Dering Photography
- StudioGuti
- Creatoom
- Creature Art Teacher
- Creator Foundry
- Patreon Collections
- Udemy - Turkce
- BigFilms
- Jerry Ghionis
- ACIDBITE
- BigMediumSmall
- Globe Plants
- Unleashed Education
- The School of Photography
- Visual Education
- LeartesStudios - Cosmos
- Fxphd
- All Veer Fancy Collection!
- All OJO Images
- All ZZVe Vectors
- CGTrader 1 CGTrader 2


