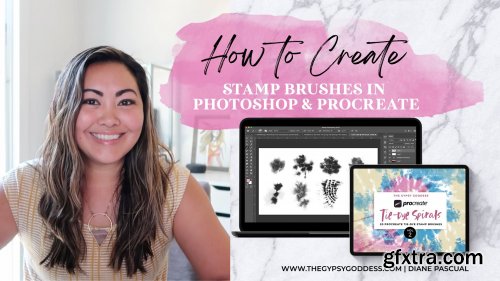
How to Create Stamp Brushes in Photoshop and Procreatehttps://www.skillshare.com/classes/How-to-Create-Stamp-Brushes-in-Photoshop-and-Procreate/1183664324
Video 1: Introduction Video
Video 2: Goal Setting and Class Project
- PDF Worksheet Included on Goal Setting on identifying what kind of brushes you want to create
- Class project will be to create five to ten Photoshop Brush Stamps, you will research and figure out what style, shape, and type that you will create.
Video 3: Tools and Equipment
- You can use any kind of watercolor paints, simple brushes, and I recommend getting a Watercolor pad of paper or sketchbook to paint on. If you are interested in painting your own brushes.
- Check out this list of recommended tools and art supplies here: https://a.co/ijTPpVc
Video 4: Pinterest Boards
- Make an account or jump into your existing account.
- Create boards of what you are inspired by and you can create based on some of the references you find.
Video 5: Brush Cleanup in Photoshop
- You can take a photo or scan your brush paintings.
- Open your brush photos in Photoshop
- Turning the photo into black and white so that we can save the image black and white.
- Go to Image > Adjustments > Black and White to turn photo and brushes into black and white
- Go to Image > Adjustments > Levels to adjust the contrast and brightness of the image
- Select the Magic Wand Tool to remove excess parts of the image that you want to delete
- Select Similar to delete areas quicker
- Save a copy of your file
Shortcuts in Photoshop on Keyboard:
- V for Move tool in Photoshop
- W for Magic Wand
- L for Lasso Tool
- Hold down shift on the Keyboard to add areas to delete
- CMD + D on the keyboard to deselect when the Magic Wand or Lasso Tool is selected
- CMD + Delete to delete areas selected by Magic Wand or Lasso Tool (or CTRL + Delete on a PC)
- CMD + J to duplicate a layer
Video 6: Setting up your Brush Document and Testing Brushes
- Setting up a new document > File > New > Square document: 2500 px by 2500 px at 72 DPI
- Open up the cleaned-up version of your other brush document file, use the lasso tool to copy the shape CMD + C (CTRL + C on PC) and paste CMD + V into the new document and paste it into a new layer.
- Paste the shapes into separate layers
- CMD + T to Transform the shape and resize the image, or rotate to 90 degrees by clicking CTRL + click on your mouse or right-clicking on your mouse
- Use the brushes to delete areas of the brush you don't want
- Drip paintbrush included to paint or delete areas
- You can adjust the transparency/ opacity of the brush to erase or paint in softly, you can also change the brush mode to CLEAR to turn any brush into an eraser.
- Erasing and cleaning up areas so that you can have other brushes bleed together
- To remove guides CMD + ;
- To Define a Brush Preset, Edit > Define Brush Preset. Make sure the background layer is off, to save the brush preset--the background must be transparent.
- To Create a Folder for your brushes, just go to your brush palette and create a folder by clicking the icon.
Video 7: Saving Brushes One by One
- Copying brush shapes one by one into separate layers, use the Lasso Tool > press CMD or CTRL + C to copy the shape and CMD + V to paste into the layer of the new document you created.
- Give each brush name a similar file path Ink Blot_01, Ink Blot_02, etc.
- Once you are done with creating each brush, you can export the entire set by going to Export brushes in the top-right icon of the brush palette.
- Upload the .abr file to Dropbox or app of your choice.
Video 8: Painting Photoshop Brushes from Scratch
- File document size 2500 px by 2500 px at 72 DPI
- Create layers for each separate brush shape
- Go to Brush Palette and click on the icon at top right corner, click on get more brushes and it will bring you to the Adobe website.
- Learn more about Kyle's brushes on the Adobe website here: Kyle Brushes
- You can use Adobe brushes to paint in the shapes of the brushes you want to create.
- You can also find reference images online or check out Pinterest for inspiration
- You can use the Lasso Tool to move shapes around to get the brush shape you want and Transform the pieces and increase or decrease the size.
- Create a layer above the reference image and paint on the top layer
- Block in the shapes first and then to define the shape, you can always go darker or erase parts of the shape
- To use any brush as an eraser, click on Brush Mode and choose Clear.
- Play with the opacity of the brush shape and create contrast for the brush shape so that it doesn't all look the same and have a little bit of variation.
Video 9: Importing Brushes into Procreate
- Upload your finished brush set file .abr onto Dropbox or an online drive of your choice.
- Download IC Brushes App onto your iPad
- Open the .abr brush file into the IC Brushes App
- Once you open it, it should be a set of brush images into on square, Click on Export to save all images and it will save them onto your Photos app on your iPad.
- Setting up the layers in Procreate for each image/shape into its own separate layer
- Go to wrench icon on top left in Procreate, Add > Insert a photo and look for the first image
- Resize the image and pinch with your fingers to fit the bounding box as big as the canvas, overlapping the canvas so that when we invert the image, there will be no white space.
- Tap on the layer and tap to invert image to have the shape with black background, then export your image one by one - converting all the brushes with a black background. This new brush shape photo with the black background will be what you import back into Procreate to create the actual brush.
- The other way to open the .abr file from Dropbox to Procreate, you can export the file and open it into Procreate - this way should be used if you are not making stamp brushes because the size and shape will not be true to the way you originally created the file.
Video 10: Procreate Brush Conversion and Sharing
- Importing the brush back into Procreate, go to your brushes > create a new set of brushes, then add a new brush by pressing the +
- Then you go to Shape > Import > look for the first image with the black background
- Brush Settings > Dynamics and change speed > Change Scale 75% (optional)
- Go to Properties > Click on Use Stamp Preview
- Go to Brush Behavior and increase the size of the brush to however large you'd like
- Preview 30%, Turn on Luminance blending, Smudge 0%
- About the brush: give it a name and sign your brush
- Once you are finished with creating each brush: Export the set by clicking on Share > export and save to Dropbox or whatever app you want to save it to.


