
- The purpose of this training is to take a base human model from Daz and then build a detailed character in Houdini. We will add clothing using vellum , model jewelry and build a full hairstyle and eyebrows in Houdini. In the end we will make shaders using materialX and light and render the model in Solaris using Karma XPU.
Content Details - 23 Video Chapters (with Audio) Duration - 6 hours 25 minutes Daz to Houdini - Import the character model from Daz into Houdini via FBX and setup a highres version using point deform. Shirt - Start modeling the clothing for the character Shirt Cloth - Add cloth to the lower half of the shirt using vellum Gloves - Model gloves using the vellum brush Shoulder Pads - Make shoulder pads and add details using images, Trace SOP and VDB Cape - Add a cape to the character using vellum Shirt Pattern - Adding ornate designs to the shirt using Particles Cloth Pattern - Adding designs to the lower cloth using particles and attaching it to the simulation via a UV deformer Pant Pattern - Making a design on the pant via shortest path and VDB Belt - Modeling and detailing belt for the character Eyebrows - Making eyebrows using hair generate and painted attributes Long Hair - Making the character’s hairstyle via guide groom and hair generate. Shaved Hair - Build the other half of the character’s hairstyle Earring - Making a simple earring for the character Solaris Setup - Setting up groups for material assignment and importing the model into Solaris. Also setting up the basic lighting Material Setup - Applying Basic materials to all the groups and setting a simple look for the character SSS setup - Setting up the basic Skin shader Cloth shaders - Making textures in Substance Sampler and Adding the textures to the various cloth shaders to finalize the look Wrinkles - Adding wrinkles to the cape using a point vop Skin Texture - Building the final skin texture in Substance painter and making the final shader in Houdini Hair Shader - Adding a colored gradient to the hair using attributes Eye shader - Applying textures to the eyes Final Thoughts - Looking at AOV setup and color grading in Photoshoplesson plan
Modeling
Rendering


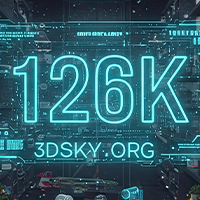
126,000 Royalty-Free 3D Model
Udemy Türkçe


Top Rated News
- CreativeLive Tutorial Collections
- Fasttracktutorials Course
- Chaos Cosmos Library
- MRMockup - Mockup Bundle
- Finding North Photography
- Sean Archer
- John Gress Photography
- Motion Science
- AwTeaches
- Learn Squared
- PhotoWhoa
- Houdini-Course
- Photigy
- August Dering Photography
- StudioGuti
- Creatoom
- Creature Art Teacher
- Creator Foundry
- Patreon Collections
- Udemy - Turkce
- BigFilms
- Jerry Ghionis
- ACIDBITE
- BigMediumSmall
- Globe Plants
- Unleashed Education
- The School of Photography
- Visual Education
- LeartesStudios - Cosmos
- Fxphd
- All Veer Fancy Collection!
- All OJO Images
- All ZZVe Vectors
- CGTrader 1 CGTrader 2


